
I have decided to build a geodome for Burning Man 2002. This is going to function as a chill space for the group I am traveling with this year, The Island of Big Bang. Yes, it's a time travel theme. But more to the point, they needed a dome, I needed to build one. Next year, I'll either use it again with Big Bang, or I could take it to another group, or take it on my own, but meanwhile, this is the test year. And the assembly year.
I am chronicalling my efforts below, complete with photos. Homage is given to Jeff, a good guy who built this same dome before me, which gave me confidence in the specs, and of course, maximum props to Tara at DesertDomes.com, whose handy online dome calulator and info pages have helped countless burners create their structures. Those who didn't major in math at CalTech, at least.
And speaking of specs, here they are:
I am building a 12' radius, 3 frequency 5/8 Geo-Dome from 3/4" EMT conduit.
|
|
|
Again, thanks to DesertDomes.com for graciously allowing me to use her graphics. Based on some leads Tara lent me, I hope to generate some Maya-rendered domes to make things even easier to see and understand in the not-too-distant future.
If you have a VRML plugin, you can see a 3D view of a similar dome at Bob Crispen's VRML Domes site. Great info there on the underlying math, but his site doesn't show any 5/8's domes, so it's not an exact match to our work here.
Lots below for your amusement. The guffaws will have to wait until I have a really interesting injury to show. Meanwhile, choose from:
-Dome Math
-Materials
-Construction Diary
-Photos
Strut A = 30 pieces 4.183' long (4'2.20")
Strut B = 55 pieces 4.842' long (4'10.08")
Strut C = 80 pieces 4.948' long (4'11.40")
4-way connectors 15
5-way connectors 6
6-way connectors 40
= 61 bolts needed (61 connections total)
Figure 1.5" (0.125') extra length needed for each strut to allow .75" from end (on each side) to centerpoint of drilled hole
Strut A = 30 pieces 4.308' long (4'3.72")
Strut B = 55 pieces 4.967' long (4'11.64")
Strut C = 80 pieces 5.073' long (5'0.88")
Rounding up for initial cutting, I need:
30x 4'4" sections
55x 5' sections, and
80x 5'1" sections.
Figure cutting blade is 1/8" thick.
Figure 10' section of conduit cut to give exact 4' 11 3/4" sections and "close enough" 5'something" sections would suffice.
This is when reality strikes. No. Turns out this won't work. It's close, but not quite precise, and precision is needed for a dome this size that goes up without a struggle. So.
11.93' Radius Dome (I'm still going to refer to it as a 12' dome, of course):
Strut A = 30 pieces 4.159' long (4'1.92")
Strut B = 55 pieces 4.814' long (4'9.77")
Strut C = 80 pieces 4.920' long (4'11.04")
Rounding up for initial cutting, I need:
30x 4'2"
55x 4'10"
80x 4'11"
So, 10 sections of conduit yield 10x C struts and 10x B struts
Continue in batches of 10 until I have all 55 (better make it 57 for extras) sections of "B" plus 57 sections of "C",
then shift to cutting "A" and "C" struts from each section.
Make first batch of cuts (55 of them) at 4'10" yields:
- one 4'10" section (only 1/4" too long) and
- one 4'11.75" section (3/4" too long)
No good. Better make first batch of cuts at 4'11" The extra 0.04" can be soaked up in a shorter flat section for the bolt with no problem.
That leaves me with remainder sections at 5'.75" May as well lop off 1 3/4" from the end and end up with 2x "C" sections from each 10' length of conduit. That gives me the 80 sections I need out of the first 40 pieces of conduit. Extras and the remaining 85 sections (A's and B's) can come from the next batch, also with 2 cuts per conduit piece.
And that's what I did. The result:
Pardon my french. F*%$. F*%$. F*%$. F*%$.
After curtting the pieces, I checked my figures to get ready to do some squishing when, to my horror, I discovered I seemed to have forgotten something important in my calculations: The additional length (1.5") to be added to each strut to account for the screw-to-screw measurements.
1.5" = .125'
(for example) 4.920' + .125' = 5.05 feet
Result: I should have cut the damn things exactly in half for my "C" struts. As things stand for now, all of my struts are exactly 1.5" too short for the 11.93' dome. F*%$. The trick is to run the dome calulator and then add .125' (1.5") to each of the lengths when you get ready to cut the damn things. That's what I *should* have done.
Ok, what can we do? Did I just waste over $200 worth of conduit, not to mention my time and energy? Let's consult the dome calulator. I will work backwards from what I have and see if I can find a combo that works right. It's only 1.5" off each, consistently, right?
So I have:
Strut A = 30 pieces 4.159' long (4'1.92")
Strut B = 55 pieces 4.814' long (4'9.77")
Strut C = 80 pieces 4.920' long (4'11.04")
Subtracting .125' from each measurement, I see I need to find a dome where strut "C" measures 4.80', strut "B" measures 4.69' and strut "C" measures 4.04'. Let's play with figures...
Woohoo! All is not lost!
Turns out an 11.62' radius dome (11' 7.44") results in the following:
Centerpoint measurements:
Strut A = 30 pieces 4.050' long (4' 1/2")
Strut B = 55 pieces 4.689' long (4'8 1/4")
Strut C = 80 pieces 4.792' long (4'9 1/2")
Those seem close enough to what I have/need to me! Looks like I'm going to lose almost 6" of my dome. That sucks. But hey, just over 11 and a half feet radius still seems pretty damn close to a 12' radius dome to me. That was close, though. Live and learn, I guess. :-(
Well, I now have the measurements I need to work towards to make my drilling and squishing templates.
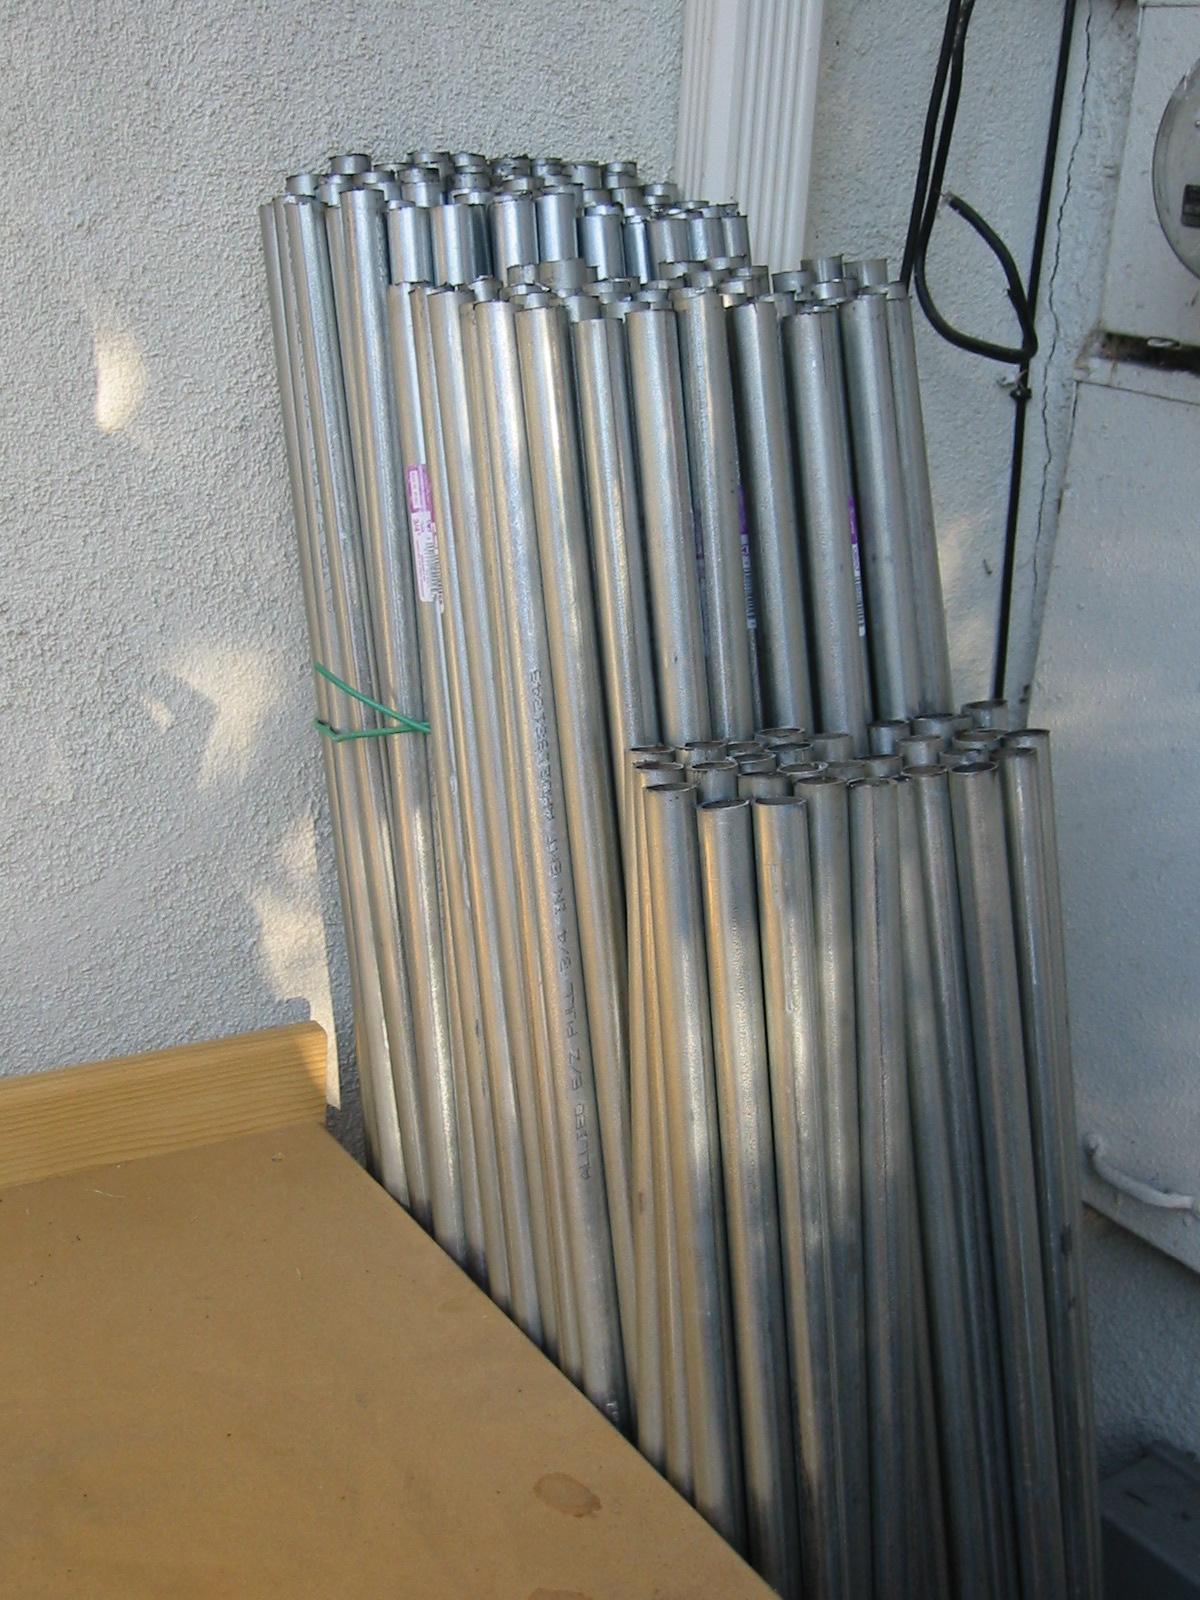
Stuff I bought for this project:
-3/4" EMT Conduit ("thinwall conduit"): $2.26 at home depot per 10' section, 90 pieces ($220, with tax).
-Work Bench: You really gotta have one. I found a nice, cheap (but functional) one at Home Depot for about $60. 5'x2' working surface, and heavy enough and sturdy enough to mount a bench vice to. This project is going to require more than the steps from the kitchen to the back yard!
-Black & Decker Hobby Bench and Project Vise: This was invaluable. I almost didn't get one, since I had the bench listed above, but when I noticed the "vise" could rotate and work vertically as well, the visions I had of conduit neatly held in place in a flat line were irresistable. Turns out the working surface flexes in the middle too much to hold the middle stuff strongly enough to saw the way I needed to, but I was still glad to have it. ($77 at Home Depot)
-Bench Vise: $50 at Osh. I'll need this for bending the conduit, once I get to that point.
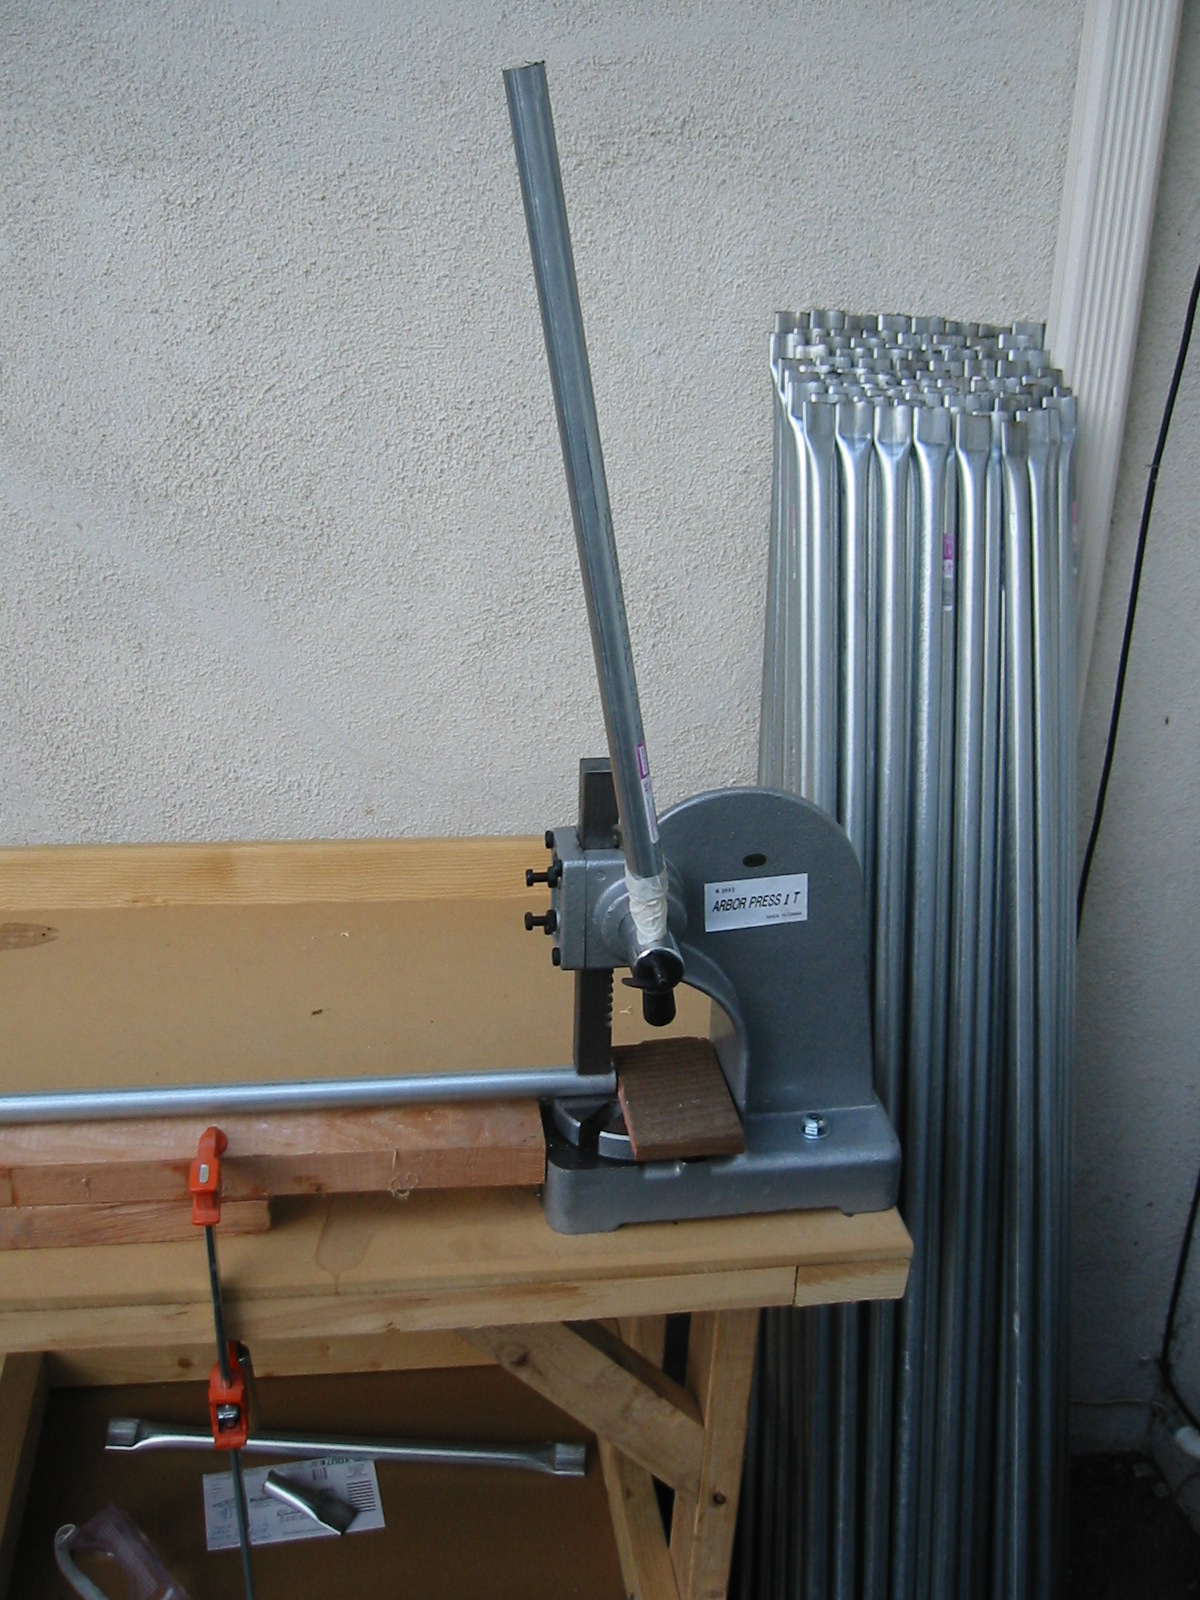
-1-ton Arbor Press: $38 at Harbor Freight. I'll need this for squishing the ends of the conduit
-1/3 hp Drill Press: $40 (slightly used, or I would have paid $80 at Harbor Freight for the exact same one). Used for drilling the bolt holes in the conduit. Duh.
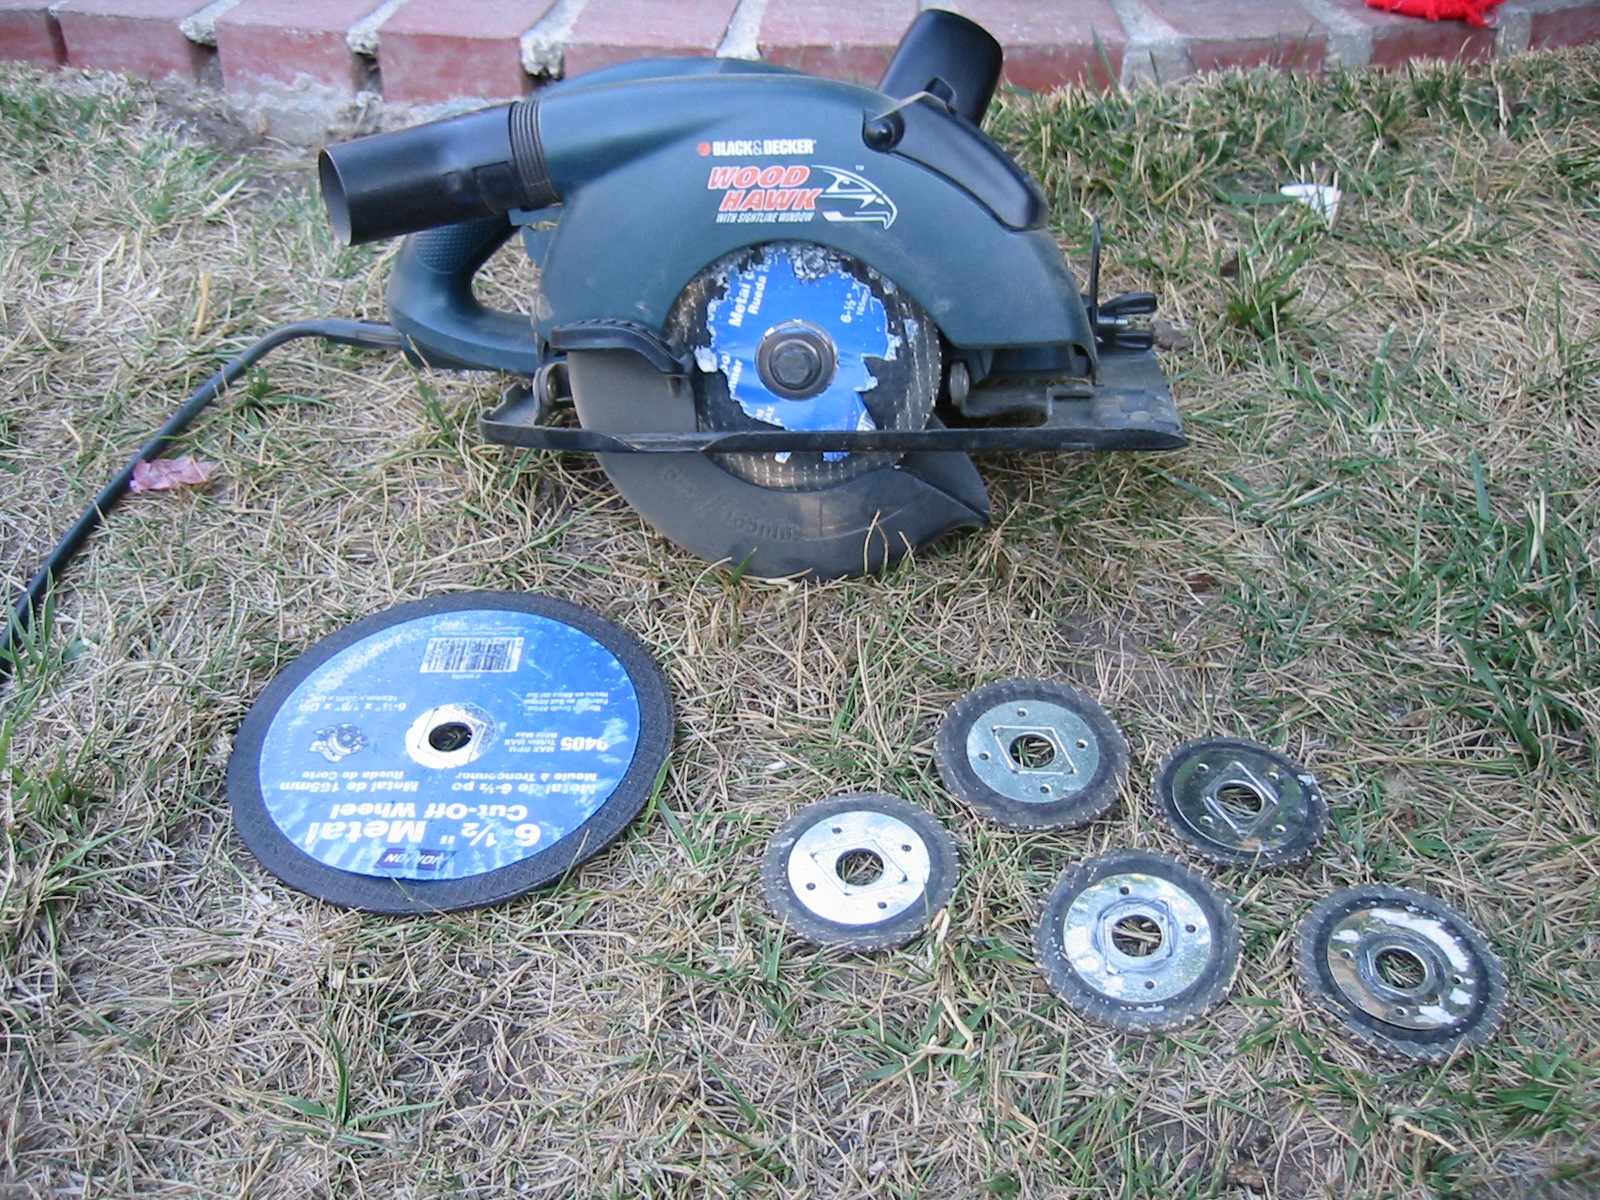
-7x 6.5" Metal cutoff blades for the circular saw: $1.83 each at Home Depot. Get the bigger ones if your saw will take them. Also, I bought the cheap Norton blades because HD only carried that brand for the smaller 6.5" saws. I'm told the better, slightly pricier onces are worth it because they last longer, but they only came in 7.25"... too big for my saw. :-(
-two 18" sliding bar clamps (by Jorgensen): $25 and change for the pair at Home Depot. I used these to hold 2x4's in place for the jig I rigged up for squishing and drilling the struts.
-Cobalt high-speed metal cutting drill bit (3/8"): $10 at Osh, plus $3.50 for cutting oil.
--Total spent so far: $560, with tax
Stuff I had:
-Various clamps: I have several of the neat wood ones from Jorgensen, the smaller and larger sizes both, and used all of them extensively. I also have used a variable band clamp, which is a nylon web belt that tightens a loop around anything, the kind you can use on picture frames and such, for making the conduit sandwich (which kept them together as one piece during cutting). I could really use another but apparently Home Depot doesn't carry them anymore. :-( I'll keep my eyes open...
-Circular Saw: Black & Decker WoodHawk. So far this has worked fine. I love it as a wood saw, but I wish (a) it was metal, due to the spaks, and (b) it was not so nice and compact, using only the 6.5" saw blades since the 7.25" blades would cut conduit faster and cooler. Works great on wood; I just hope it survives cutting all this metal...
-14' Accordian-style ladder: I'll use this to assemble the finished dome, but it also worked great during the cutting phase as a sawhorse when I put is in the "M" mode to emulate a double sawhorse. Just the right height for the Black & Decker hobby bench. I laid the long lenghts of conduit on it to keep it all flat while I cut. I'll probably end up needing another, longer one for the final assembly stages, cuz I don't think this one is tall enough for the very highest bits.
-Various wood saws, scrap wood, tape measures, etc.
Stuff I still need to buy:
-17' accordian ladder: This can wait until the end of the project, as my existing ladders will do until I'm ready to actually fully assemble the sucker. $170 at Home Depot, unless I can borrow one somewhere
-Nuts, bolts and washers: Up next. One box of 100 coarse-thread 3/8" Hex bolts, 2.5" long, zinc coated for rust prevention, one box of 100 nuts, one box of 3/8" flat-cut washers. Should be roughly $35, total, at Home Depot. I should also hit Harbor Freight and pick up a bunch of cheap socket wrenches in the appropriate size so that multiple people can assist with the assembly at once.
-Spray paint: 3 cans in 3 differnet colors, for color-coding the various strut lengths. Makes assembly a lot easier. Also helps prevent rust in the exposed ends where I have cut and drilled through the galvanized coating. No point in buying them until I have finished drilling, though. Update: I went with a $2.50 pack of electrical tape in multiple colors instead. We'll see how it holds up... if not so well, I'll paint them for next year.
-Arbor press plate: Turns out I don't need this after all. But I might want to get one someday.
-Trailer: Gotta get this dome to Burning Man, don't I?!? Estimate $300-400.
-Tarps: This will wait until (a) I have the money, and (b) they're on sale. Not much point in a dome without a roof unless we're going ThunderDome, and this isn't strong enough for that many people to climb. The heavy-duty, silvery-reflective tarps will form the skin for this dome. 2 tarps: one 20x30 (to be cut into 3 10x20 strips, $55 reg price) and one 40x30 (to be cut into one 10x30 and one 30x30 tarp, $100 reg price). Basically, the 10xwhatever strip tarps will go around the base, and the large 30x30 tarp will go over the top. It'll all be held in place with ropes and perhaps some tarp clips.
-Turbine vents: Again, no point until final assembly, but these will let the hot (I mean, "HOT!!!") air out of the roof during those blazing hot days on the playa. And should it rain, they're pretty weatherproof, being designed for roofs and all. About $25 each at Home Depot.
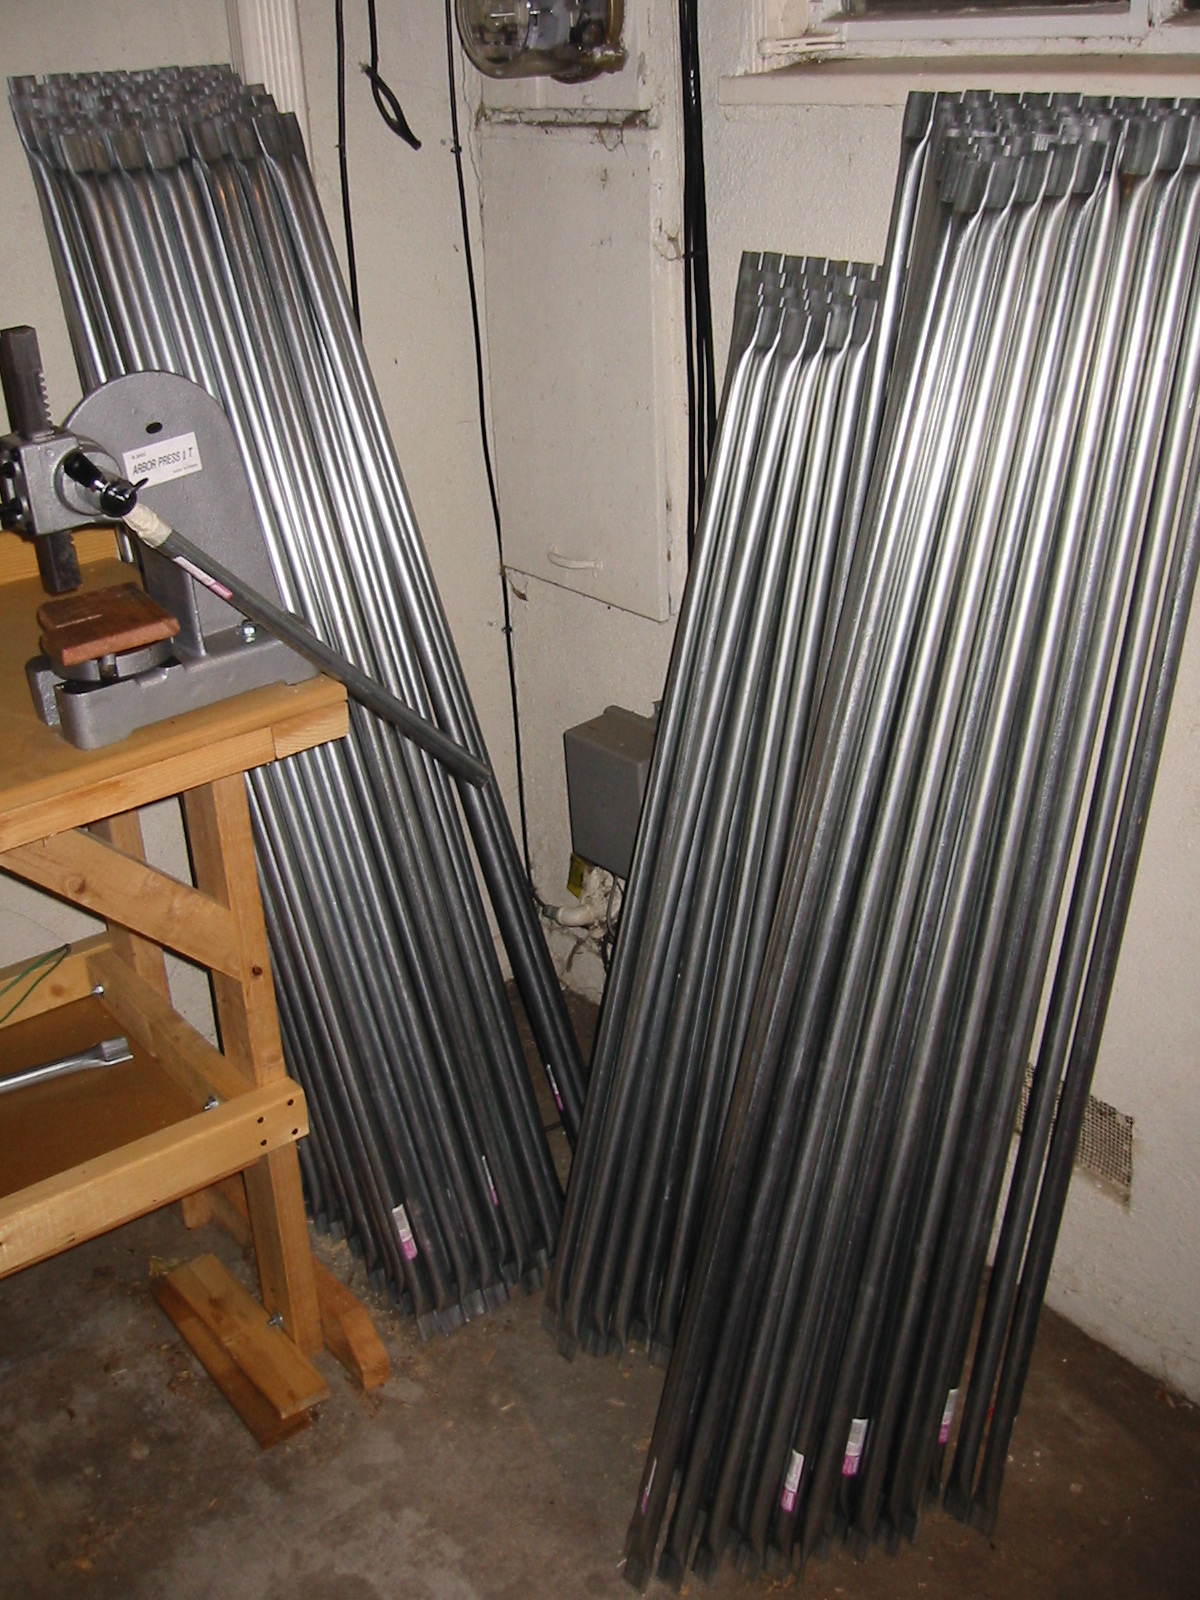
The real work begins. I finally had collected all the tools I thought I would need, enough raw materials to start (that is, twenty 10' sections of 3/4" EMT conduit) and had worked out the actual math so I knew exactly what I needed to cut each piece of conduit down to.
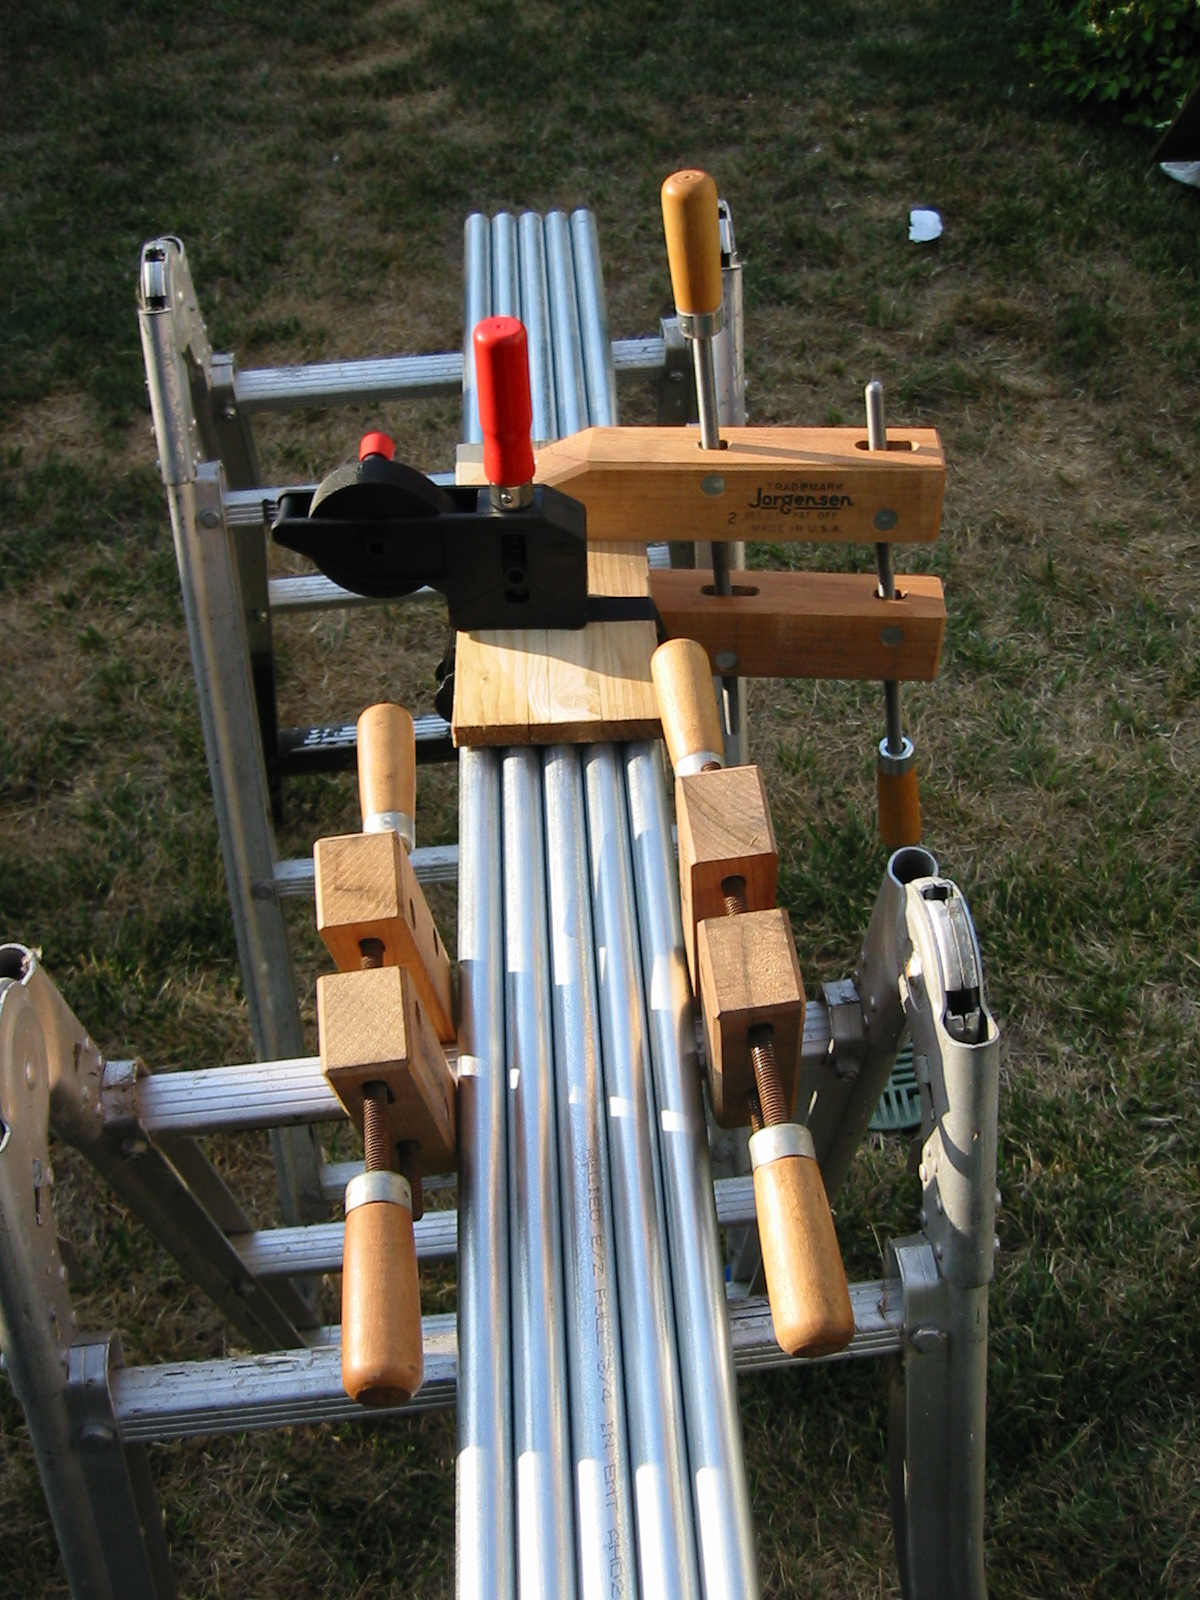
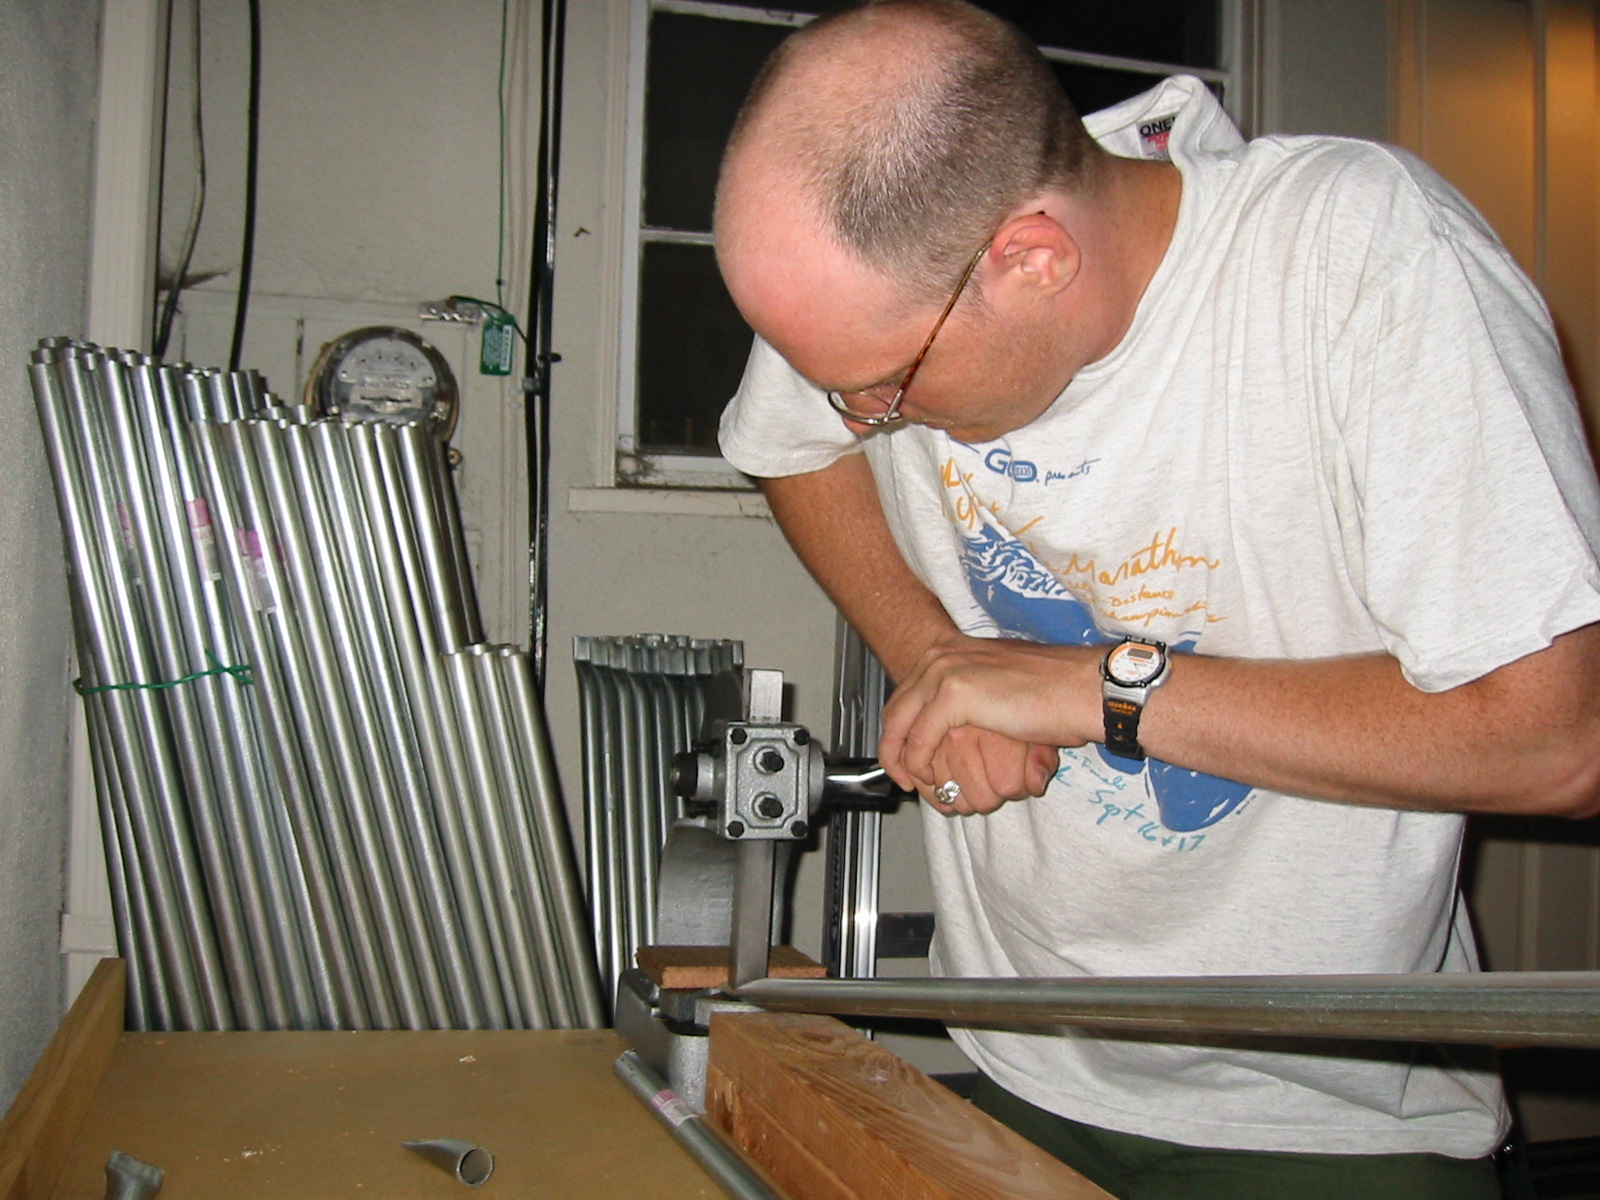
I have read the horror stories about how long it took to cut all the damn conduit sections needed for a decent-size dome. I had a plan to drastically cut that time down, however. The plan was to lay out the conduit in a long row, and just run the circular saw over it with a metal cutoff blade to cut many pieces in great swaths. I was even more keen on this when I got the hobby bench. Reality was a more limited application of that theory. The problem, of course, is that the conduit doesn't really like being cut, and tries to squirm out of the way. *g* To make a long story short, I ended up doing it in groups of 5. Still quite fast compared to doing it one at a time, I'd image.
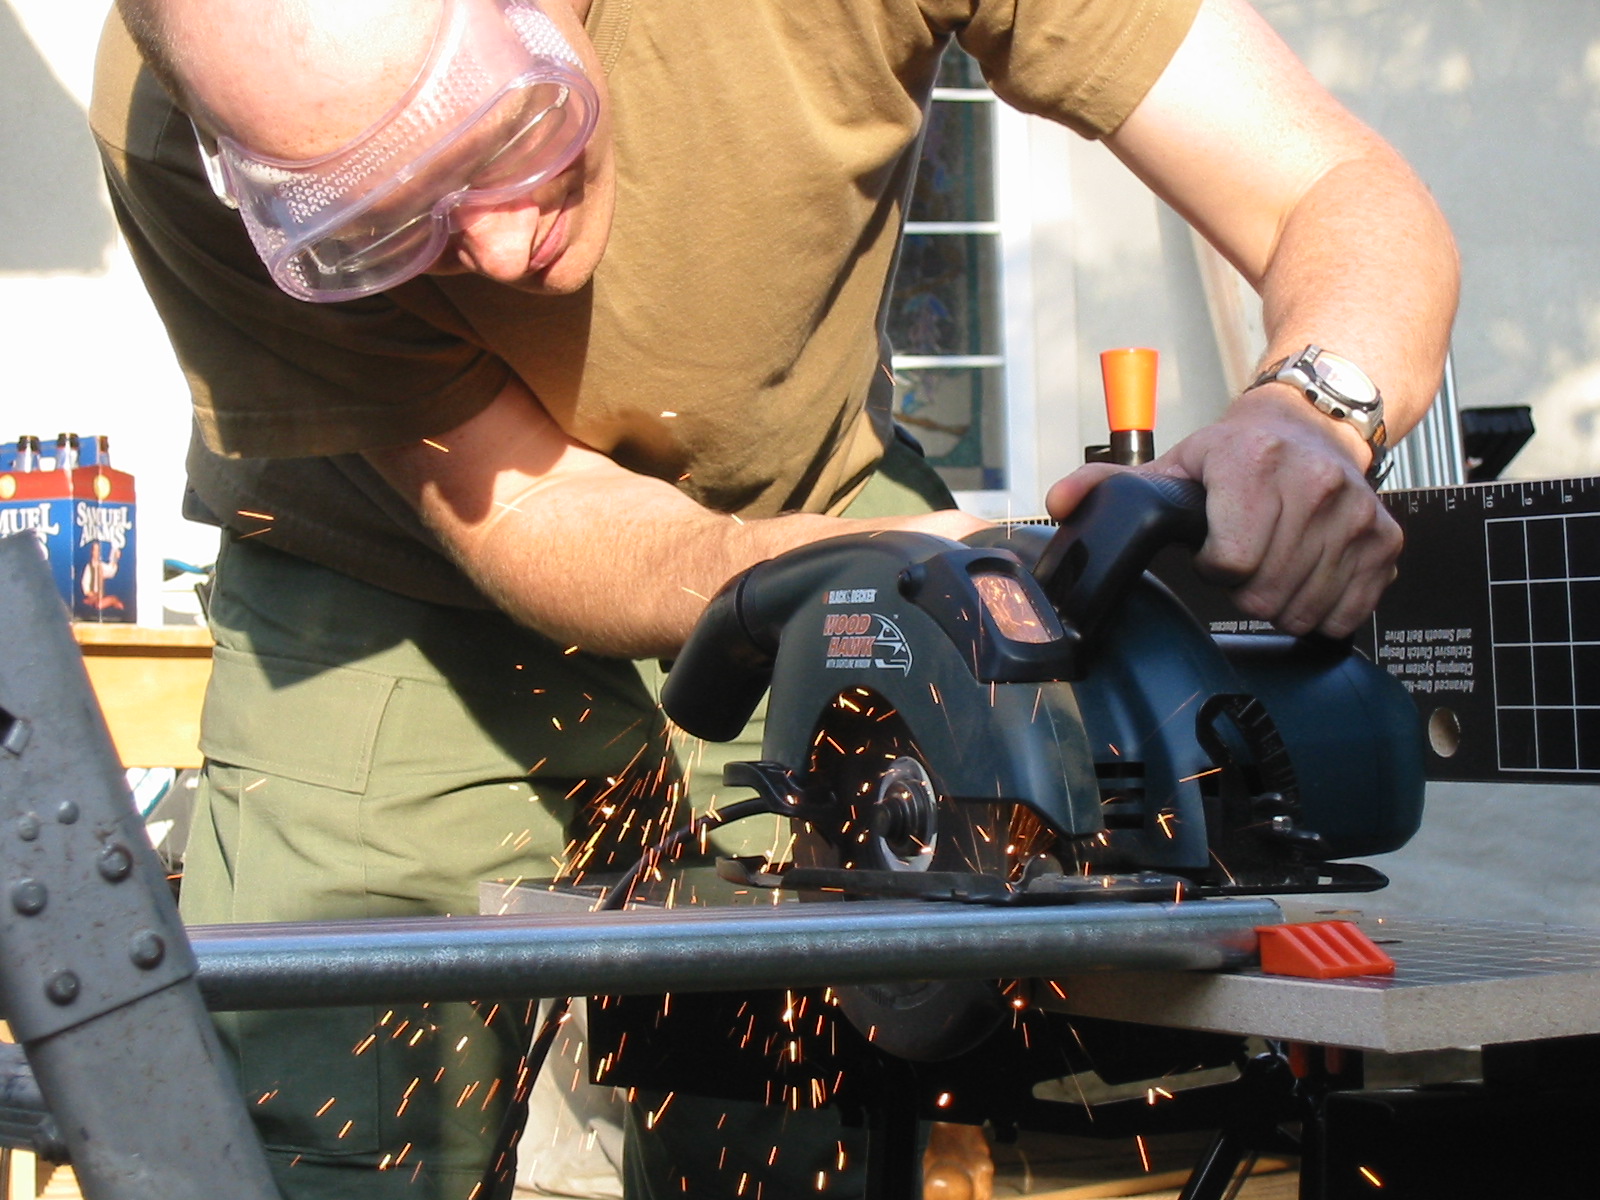
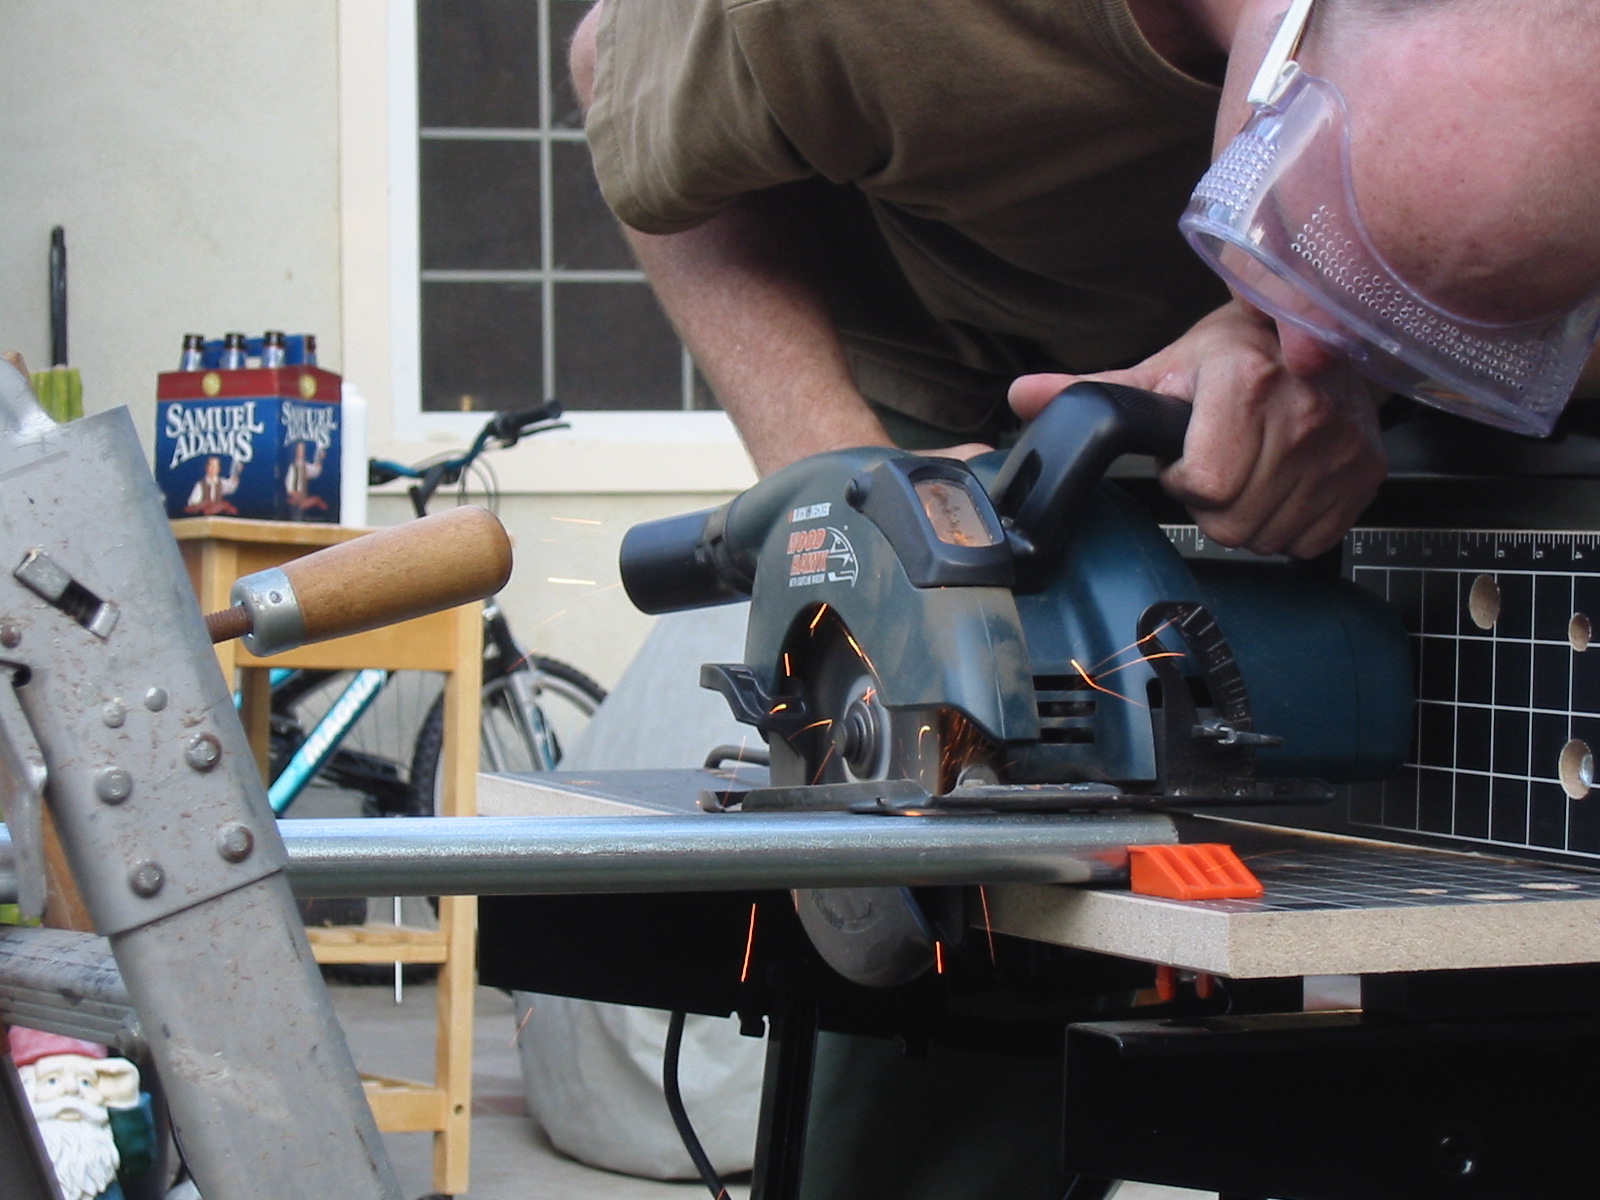
I had issues, on the first cut, with the pipes wanting to move around. I solved the problem with a combination of a the vertical vise mode of my hobby bench, some various clamps, and a couple of pieces of scrap wood. I made a conduit sandwich with the scrap wood, and then basically clamped the hell out of everything. That seemed to hold things securely enough to cut five pieces at a time. I might have been able to go longer and do more pieces at once, but frankly, I was worried for my circular saw. I have a Black & Decker WoodHawk, which is great for wood, but it has a plastic body. As you may be able to see from the pictures, the metal cutoff blade produced *huge* showers of sparks. Trust me, only some of them show in the pictures. I was seriously worried about the heat melting the plastic parts of my saw, and the sparks setting things (including me!) on fire. Even with a better saw, cutting much more than 5 at once would probably cause issues with heat, possibly burning the conduit, and definitely shortening the life of the cutoff blades. Two things to keep in mind: 1) I was very greatful for my new haircut (that is to say, almost none). If I had still had long hair that wasn't seriously controlled, I'd have been panicing about being set on fire. As it was, I was a little concerned for my pants and shirt, but so far they've been fine. 2) I wear glasses. As such I tend to scoff at warnings about wearing safety goggles. Wear them. You have to stick your face pretty damn close to the source of those sparks to see where the saw wants to go (and coax it into the direction YOU want it to go). I repeat: Wear safety goggles.
So far, on this first real day of work, I have accomplished the following: 1) I actually Worked out all the math calculations (with the help of Tara's Dome Calculator, of course) to where I actually understand them, which is something I had hoped to avoid. Just do it. You need to really get what you're doing with the end drill allowances, etc. 2) I have a methodology for cutting conduit that should get me through all the cuts I'll need through the rest of this project. 3) I have produced 38 of the 80 "C" struts I need. It would have been 40, but one of the pieces of conduit I bought in a bundle was dented so bad it wasn't straight any more, and considering this is a structural member (as are all the sections), I thought it best that I not use a damaged beam. I'll return it when I go to get the next batches. (Purchasing the conduit in bundles of 10 makes things easier on the pocketbook than buying it all at once, and since I'm getting it at Home Depot, it's not like there is a volume discount.) I actually made all the cuts, including working out the best way to do it, in about 2 hours. The rest of the day was running back and forth to Home Depot for various things and the math. I suspect I'll whip through the next 20 sections of conduit (21 with the replacement piece, I guess) in far less time, producing the next 40 C struts. After that I'll start doing the A and B struts. Now I have to actually find out if I really need a press plate for the arbor press or if I can get away with using it as it came...
I'm going to keep a running total of how much time I'm putting into this. I suspect it will be largely estimated, but I'm going to try to figure out how much time I'm actually spending doing work, defined as putting tools to raw materials, as opposed to messing around, trying to figure out the best way to do stuff, running math figures through the dome calculator, running errands to Home Depot for supplies, updating this page ;-) etc.
HANDS-ON TIME SPENT: 2 Hours
EXPERIMENTATION, ERRANDS, ORGANIZATION TIME SPENT: 2 Hours
RUNNING TOTAL: 2 Hours hands on, 2 Hours other
Saturday: 6/22/02
Damn computer crash ate my update before I hit save. Ok. Short version: Faires done. Work Resumes. Late start. Bought 71 sections of conduit; should be all I need. By the time I got my late start, set up and go to work, I only cut 12 more before dark. (I threw one more section into the one batch I worked with to make up for the bent one from last time.) Now up to 50 "C" pieces completed.
HANDS-ON TIME SPENT: 1/2 Hour
EXPERIMENTATION, ERRANDS, ORGANIZATION TIME SPENT: 1.5 Hours
RUNNING TOTAL: 2.5 Hours hands on, 3.5 Hours other
Sunday: 6/23/02
Late start, as usual, but not as bad. In one half-hour stretch, since I was mostly set up still from working yesterday, I cut 16 more sections of conduit in three cutting sessions (2 cuts per session). I figured out a slightly better way of working the clamps and such, so I basically meansure both cuts at once (4'11" from each end), run the drill once, let the finished sections fall away, and the run the drill again through the still-clamped other sections, letting the 1.5" (roughly) remnants fall away, before I have to pull everything out and re-set the clamps, measure, etc. (I promise I'll photograph it later) So I finished 32 more sections today, bringing me to a grand total of 82 "C"-length sections. This gives me two spares. I'm sure I'll need more, but I want to cut all the stuff I need before I start going crazy with the spares. That was the big push, of course, the C's. I'm just about halfway done. Woohoo!
Oh, point of interest: I finally had to change the cutoff blade on my circular saw while finishing the last cuts. So I was able to make approx 70 poles on the one cutoff wheel. At that rate, one or two more and I should be able to finish this project. Considering they're $1.88, that's pretty good, IMO. What sucks is a trip to Home Depot might spell doom for finishing all the cutting today. We'll see. Perhaps I'll pick up something to clean up the cut ends while I'm there, like a grinding wheel I can mount on my drill or something like that. There are some pretty sharps ends on those puppies. Hmm, perhaps some bolts to tie down the arbor press might be in order, as well...
Annoyingly, I'm going to have to start labeling the sections. Because next up I get to start cutting A's and B's, and I just know they'll all get mixed together. The current plan is to just tag each pole with a sharpie and write a "C" on each end. Still, I'm proud I got all those cuts done in a half hour. Time to stop mucking about on the computer (ahh... air conditioning...) and get back to work.
Let's see:
30x 4'2"
55x 4'10"
80x 4'11"
I have the 80 4'11" "C"-length poles now, so onto the 55 B's I need at 4'10". Back in a flash!
Well, that was a short 15 minutes, eh? I sure wish I knew how on earth I managed to go through an entire cutoff wheel that fast. Perhaps the first one was a fluke? Maybe this second one was extra-poorly made? I have no idea. But looks like I'm headed back to Home depot early... I think I'll grab about 5...
Another hour from my life gone due to a Home Depot run. But I have enough cutoff blades to finish the job, I think. I have carriage bolts for the arbor press. And I decided to pass on the $40 6" bench grinding wheel and just borrow my father's for free, once I get to that point.
I resumed work at 4:15. It's now 5:40 and I've finished 57 B's, so that's one more down (2 are spares, of course.) I have enough conduit left for 42 more sections (21 tubes), and I only NEED 32, so I should be pretty good shape shortly. I've gone through two more cutoffs, so I have what's left of this fairly new one, and two remaining. I'm confident that will cover me. Ok, back out for 32 4'2" A sections...
7:00. All done. And that includes cleanup and starting to prep the arbor press for attachment to my work bench. So... an hour? Nah. More like 45 minutes of actual hands-on work.
I mounted the arbor press to the workbench, and tested a piece of scrap. Ahhh, squishy goodness. This should be no problem, once I make some sort of template. Point of interest: I have been told I need some sort of thick steel press plate for the arbor press. I can see how that might be the case with larger diameter stock, but this stuff is small enough the plate the thing came with seems to work fine.
Remaining to do: Make template and squish all the ends. Once everything is squished, the arbor press goes into the garage to be replaced by the drill press for some hole-y fun. Then another template for drilling the three size poles. Yet another template for the bending. And then the actual assembly! Woohoo! The nice thing about these next parts is they are the sort of thing that doesn't require quite so much setup. So I should be able to do a few every night instead of needing to do them all in one big batch, like the cutting. The cutting required daylight and lots of stretches of time, because there was too much setup. I can't wait to do more!
After putzing about for an hour with math after I realized my mistake with the strut lengths vs. centerpoint / bolt-to-bolt measurements, and figuring the updated measurements I needed for the squishing part, I decided to cut a small piece of scrap wood to use as a stop in the throat of the arbor press. That way I just stick the strut under the press rod, going back in until it hits the wood and stops. Presto! Perfect squishes every time. I tested this a few times with some of the remnant bits of conduit before trying it with the real struts.
I took 2 pieces of 2x4 stacked on top of each other just to support the strut while it was being squished. It just made things a little esier, I think, because it made it a fairly flat run rather than having it hang out of the mouth of the press. I should note that I have read that it is important to squish the conduit with the center weld in the middle of the swuished section, as apparently it can split if it is on an end. So I did my best to find the weld and put it in the middle. It was dark, however, and sometimes hard to tell, so I may or may not have been successful in correctly identifying the weld. Regardless, I have not had any problems with splitting so far. (*Note: I have since been told that the weld should actually be at a 45 degree angle to prevent splitting, not right in the middle, where I have been doing it. Bit I have yet to split a single piece. Just lucky? Who knows.) So tonight, in a little under an hour, I squished one end of all 32 of my "A" struts. I'll squish the ends of all the other struts throughout the week.
Two things to note about squishing with this arbor press. First, while it's not teriibly difficult, it took a little bit of muscle, and putting some weight onto the bar, to squish the poles. As I mentioned, however, it wasn't that bad. This was definitely the most physically demanding part of this project so far, however, with the possible exception of schlepping the 10' long bundles of 10 conduit sections (from Home Depot) from my car to the back yard. The second thing to mention is it's fairly critical that the flat ends being along the same plane. It wouldn't do to have a twist from one end to the next... so I will need to rig a jig of some sort (perhaps just a slot in a piece of scrap wood) to ensure the squished ends line up perfectly.
HANDS-ON TIME SPENT: 4 Hours
EXPERIMENTATION, ERRANDS, ORGANIZATION TIME SPENT: 4 Hours
RUNNING TOTAL: 6.5 Hours hands on, 7.5 Hours other
Monday: 6/24/02
More squishing. And may I say it's running smoothly? It only took an hour and a half to squish all 139 remaining ends (57 B's and 82 C's). I took Jeff's advice and used a piece of longer conduit scrap (the long ones in the picture... about 20") as a cheater bar to make squishing easier. I just removed the rubber end cap, slid the bar over, and wrapped a bit of tape around the end to hold it in place. Ugly, but it made squishing MUCH easier. That's how I was able to go through it so fast.
Of course, I've only squished one end of each strut, and I still need to squish the other end. Tomorrow, I'm going to figure out what sort of a jig I want to make to ensure the squishes are in the same plane. I'm thinking I'll use my router or even the skilsaw and cut a long grove in a 2x4 that the conduit can sit in. The flat flange on the squished end will keep it perfectly flat, even allowing for slight variances in the angle of the flange, while I squish the other end. At the rate I'm squishing, depending on how long it takes me to cut the groove (man, I wish I had a table saw!), I should be able to finish squishing everything tomorrow evening, and then I'll be ready for drilling! Woohoo!
HANDS-ON TIME SPENT: 1.5 Hours
EXPERIMENTATION, ERRANDS, ORGANIZATION TIME SPENT: .25 Hours
RUNNING TOTAL: 8.0 Hours hands on, 7.75 Hours other
Wednesday: 6/26/02
Finished squishing. I figured out a jig, but decided I needed a couple more clamps, with a small footprint and larger throat size, than the wood Jorgensen ones I had, so I picked up two 18" clamps (ironically, also by Jorgensen) at Home Depot, of course. $25 for the pair. picked up Made a jig of sorts by cutting a slot into a piece of scrap and mounting on the far end. All I had to do was slot the finished end into place, pull the strut up to the stop block, and squish! I finished the whole lot in about 2.5 hours, but I'd guess it took a good hour of futzing and experimenting before I got my system down. Ironically, the last 32 "A" struts proved the most difficult ... the jig I had made did not go short enough, so the strut wouldn't reach the slot at the far end! I cobbled together a hack job and got it done, but lessons were learned.
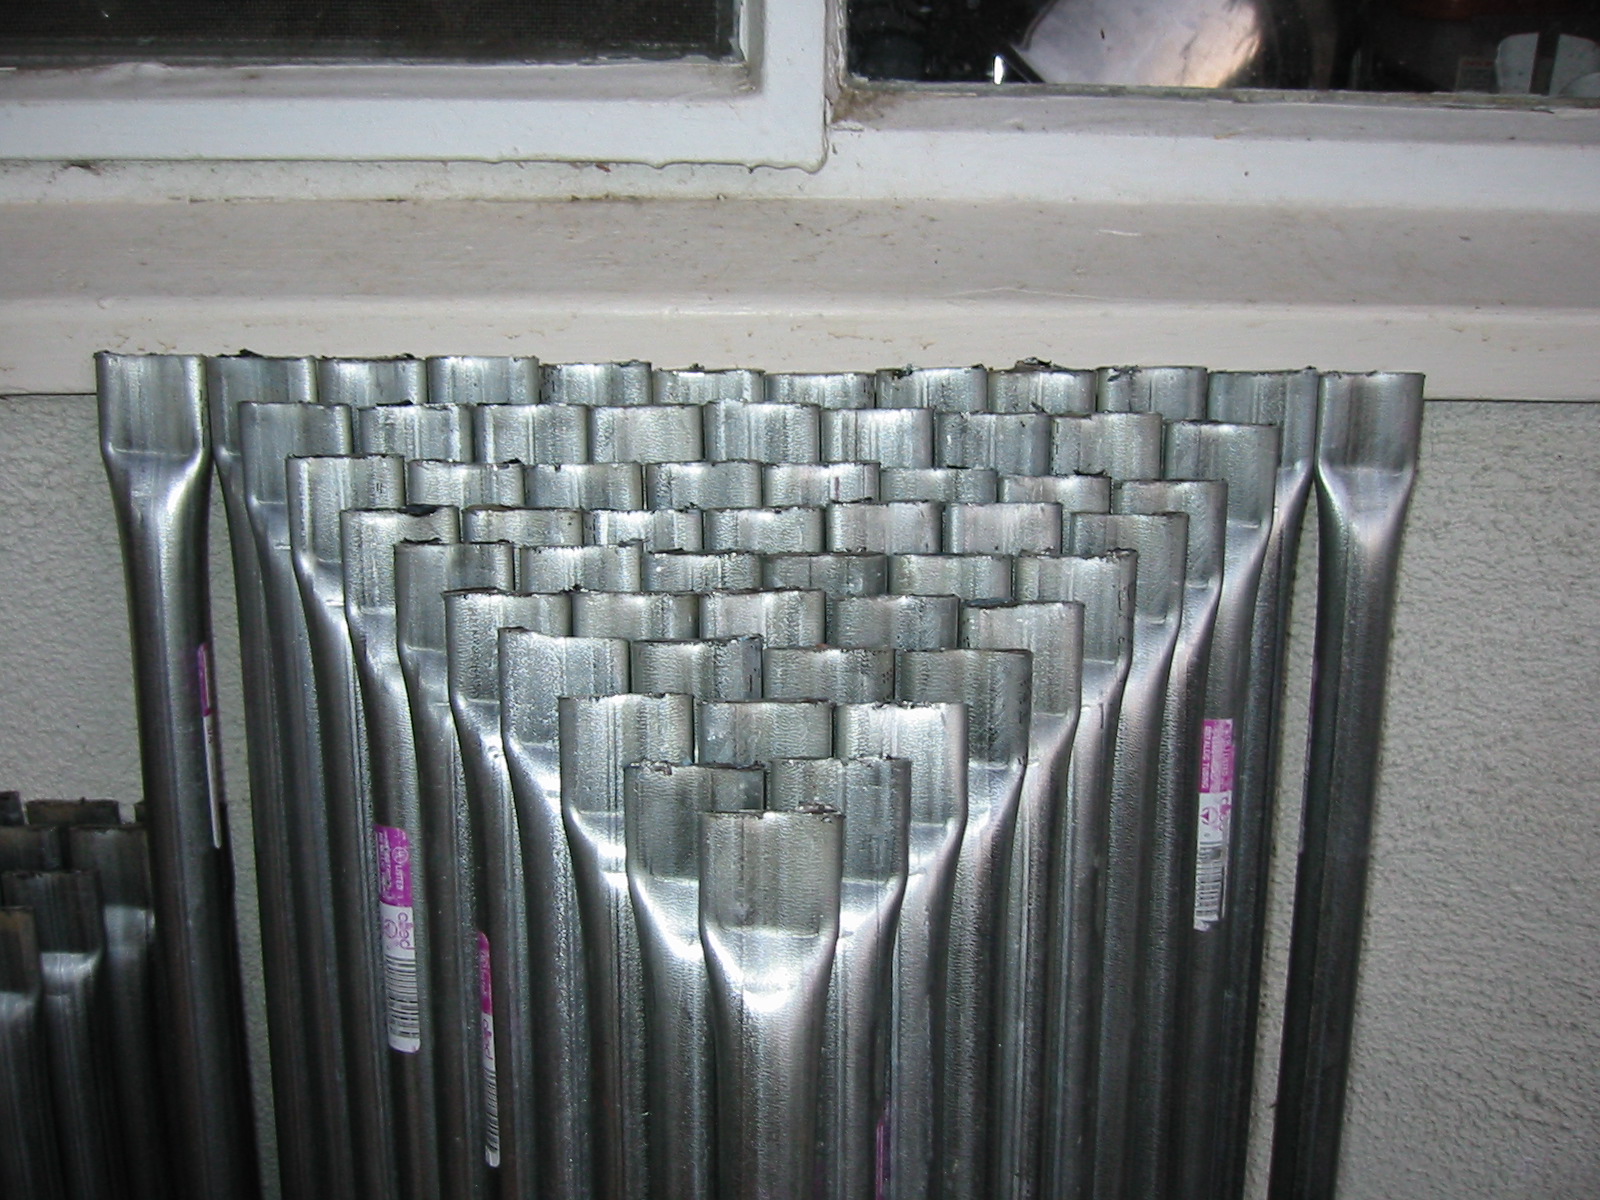
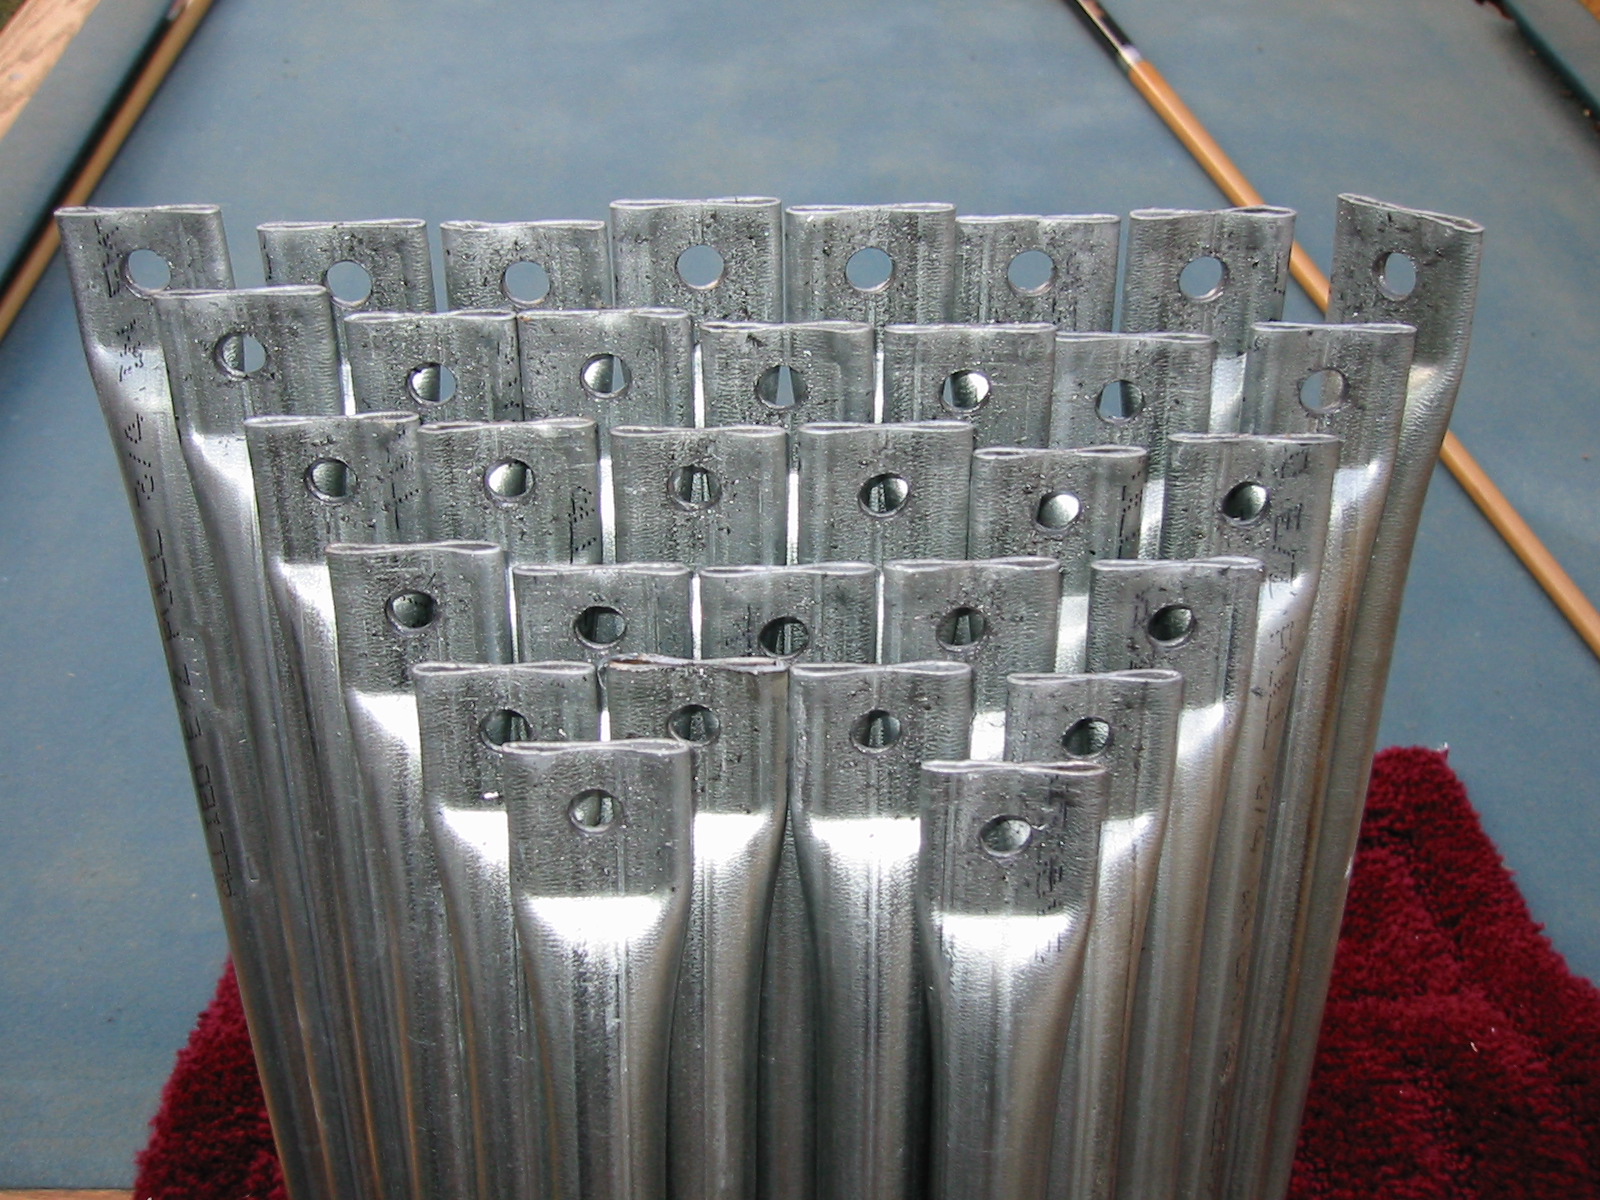
I noticed, when squishing the second side, that because the bar could not bend up as I had allowed it to on the first squish, the second squish "profile", for lack of a better word, seemed to have one side squished farther up than the other. This is because of the difference between the round base plate that came with the arbor press and the squishing ramrod itself. (See "Profile" pic below, also compare the drilled C's to the drilled A's, a few pics later). I suspect this is because I didn't bother to purchase press plates for the arbor press. Hopefully this won't cause any problems, but I will attempt to face all the poles in one direction, for consistency's sake. All of the "longer" squished sides can then face into the dome or out of it, depending on what decision I make when it comes time for assembly. We'll see...
HANDS-ON TIME SPENT: 2.5 Hours
EXPERIMENTATION, ERRANDS, ORGANIZATION TIME SPENT: 1 Hour
RUNNING TOTAL: 10.5 Hours hands on, 8.75 Hours other
Saturday: 6/29/02
After scouting out a few different stores during the week, and talking to various salespeople, I determined that Cobalt drill bits are best suited for drilling lots of metal. The suckers are designed to drill through armor plate, even! Also critical, when cutting metal, is using cutting oil. So off to Osh, and I'm ready to jury-rig yet another jig.
I moved the arbor press out of the way and used the bolts to mount the drill press securely to my work bench. Some stacked 2x4's, screwed together to make them stay stacked, and a 1x4 for the jig itself, and I'm ready to go. I used the two bar clamps to keep everything in place. I used two of the wood clamps at the end to make a channel for the strut end, and two screws in the middle of the board seem to be doing a nice job of slotting the struts into place quickly, easily, and accurately.
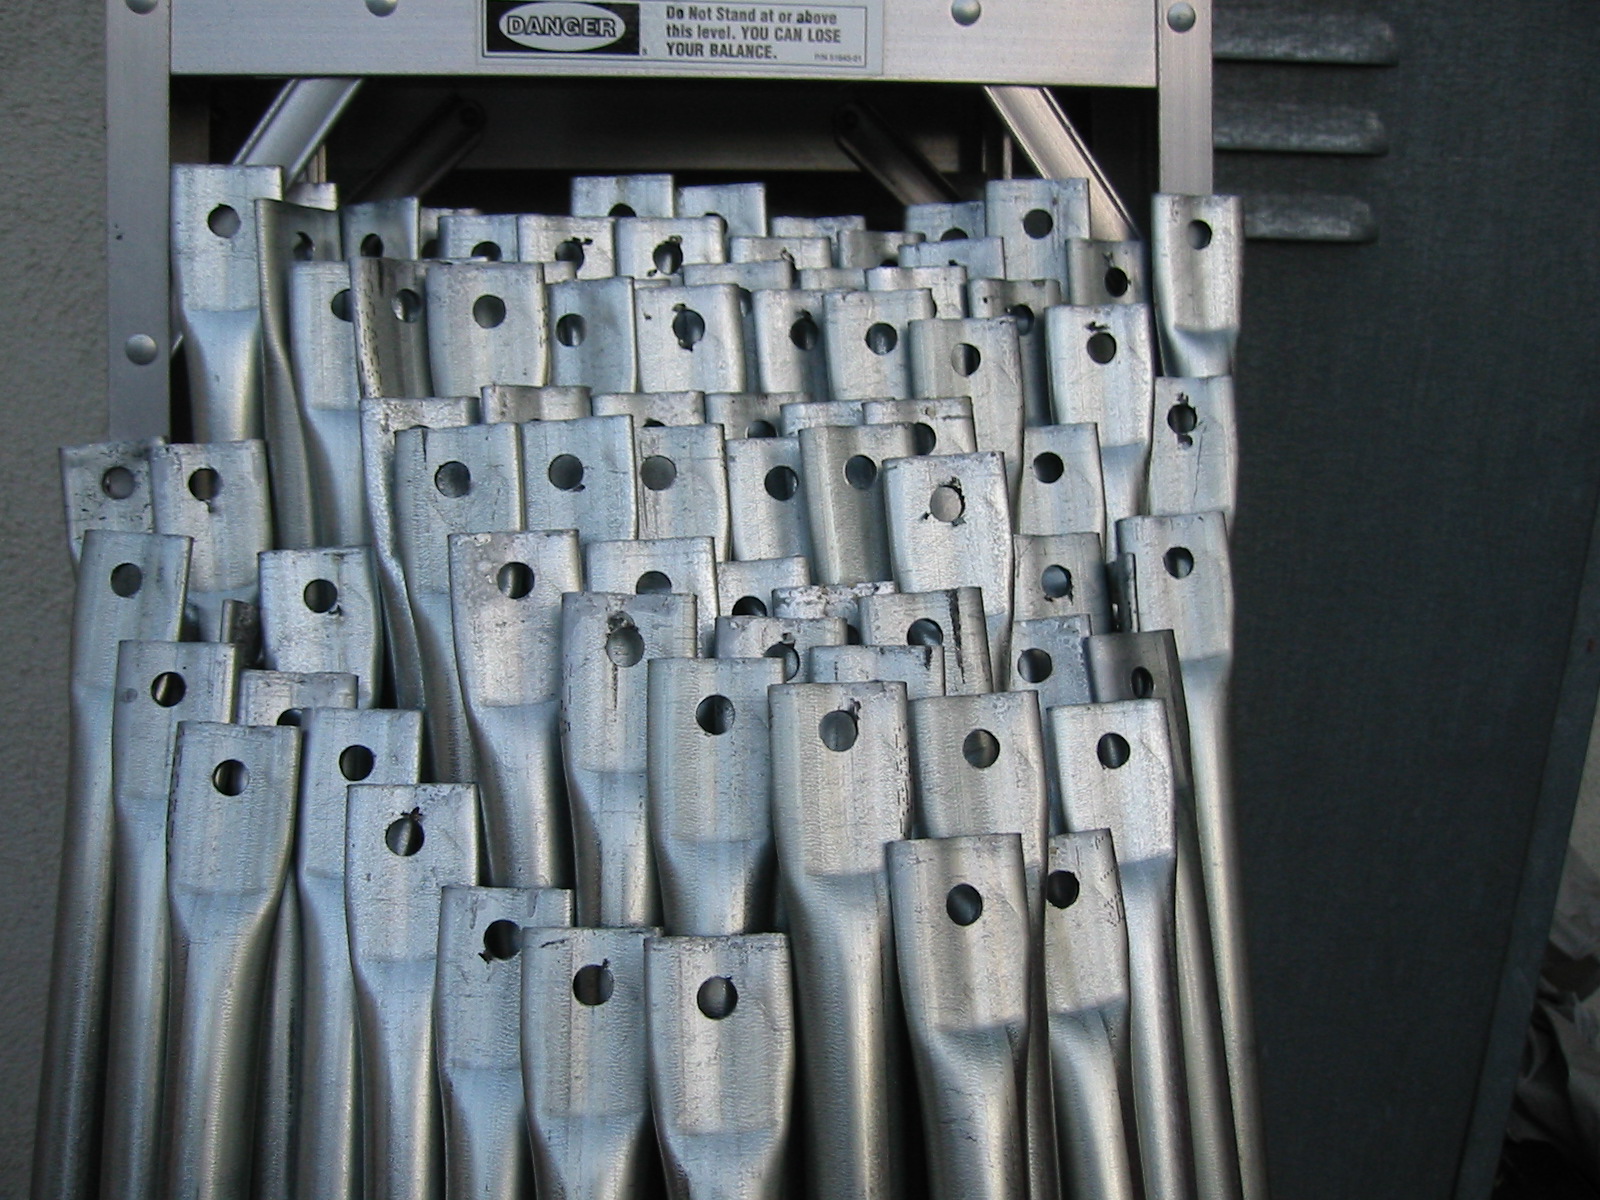
Finally drilling. I decided to eyeball the holes on the first end. When I set up the jig for the second side, the more precise measurement will fall into place. You'll see where I drilled the first hole in pictures below (basically about 1/4" from the end, along the inside edge of the square the arbor press made when squishing it flat). Note that I placed a drop of cutting oil on end end before drilling, in an attempt to preserve my bit and avoid the need for sharpening it. That drop also makes a dandy aiming dot when manoeuvering the struts into place. Also note that I didn't have the struts strapped into place... I basically held them down with one hand while I lowered the drill with the other. This allowed me to make small adjustments to the angle, etc., as the bit started biting into the metal.
Be careful drilling, and note far far you're going through. Go slow... the bit had a tendency to bit off more than it could chew on some occasions when I got lax. This caused the bit to slam into metal too thick to cut through, which brought the whole thing to a screeching halt. Once or twice it even caused the strut to get drawn up the bit very forcefully, jerking it right out of the hand holding it down, even. I had to kill the drill press and manually spin the bit backwards to walk the pole off the bit, and start more slowly. I found it best to watch carefully where you are, and then, when you get close to punching through, back it off frequently to check progress, and apply less and less pressure until it finally gently pushed through the other side.
It's going at a reasonable speed, I guess. Lots of interruptions, so it's hard to track, but I'd say I did 40 in the first 1.5 hrs and later, the remaining 42 "C" struts in one hour. That's only one end, of course... as with the squishing, I plan to drill one end of each first before bothering with the jig for the precision hole.
One tip learned: Wear long pants and boots when drilling metal. The metal flash (think sawdust) is (a) hot, (b) sharp, and (c) likely to go flying out right at you... or end up IN the sides of your shoes if you're wearing topsiders without socks! Once I'm done with all the drilling, on both sides, I'll need to use a tool of some sort to clean the sharp flash out of the holes, in addition to cleaning the sharp bits off the ends with the bench grinder.
HANDS-ON TIME SPENT: 2.5 Hours
EXPERIMENTATION, ERRANDS, ORGANIZATION TIME SPENT: 1.5 Hours
RUNNING TOTAL: 13.0 Hours hands on, 10.25 Hours other
Sunday: 6/30/02
Finished up the drilling of one end. As could be predicted, it took just over 2 hours to drill the remaining 89 sections (32 A's and 57 B's), with minimal time wasted, because everything was still set up from drilling the C's. Boring entry, I know, but it was all straightforward, with no surprises. Getting so close, though!!! WOOHOO!!!
By the way, I apologize for so many pictures of the ends of semi-finished poles. I'm sure, reading this info all in one sitting, long after construction ceases, they seem highly repetitive. However, you have no idea how satisying it is to take that picture, indicating one more completed step towards the goal. Or, if you have built a dome before, or if you are following these logs in an effort to build your own dome, you (will) understand completely.
That's it for this installment. More to come as I complete more bits!
HANDS-ON TIME SPENT: 2.0 Hours
EXPERIMENTATION, ERRANDS, ORGANIZATION TIME SPENT: .25 Hours
RUNNING TOTAL: 15.0 Hours hands on, 10.5 Hours other
Friday: 7/5/02
Drilling all done now, finally. If I never see another squished pole waiting to be drilled, it'll be too soon. The last 30 or so I could tell the drill bit was getting to the point of needing sharpening, but a little extra pressure and I was able to finish out the batch. Handy, because I don't have a bit sharpener and really don't feel like buying one just for this project. I'm sure glad I bought the super-duper cobalt drill bit, however... any lesser bits would not have finished this job without needing sharpening. As it is, drilling nearly 400 holes through steel pipe before needing sharpening is pretty damn good, if you ask me. Aside from that, however, the last holes went smoothly... with one exception, which I'll go into below.
At any rate, here's how I did it. The first hole was fairly non-essential, from a placement standpoint (with one exception that I'll go into below). The second hole, however, needs to be a fixed, precise distance for this whole dome concept to work out. This is rather easily accomplished, however by a board with a bolt for alignment. I took a 1x4 and laid it out under the drill press, building up a stand of sorts with scrap wood so the whole thing lay level. Then I placed the first "C" strut on the board. I measured from the mid-point of the first hole to exactly where I needed to drill the centerpoint of the second hole, on the far end. You may recall the centerpoint-centerpoint measurements are as follows: A's are 4' 1/2", B's are 4' 8 1/4", and C's are 4' 9 1/2". I placed the strut and board under the drill press, and lowered the bit to touch the pole to make sure I was lined up to exactly where I wanted to drill. (See photos below) I marked where the hole was at the drilled end, drilled a 3/8" hole in the 1x4, dropped a 3" long bolt in (with washers) and locked the whole thing down with a nut. Now I had a bolt sticking out that I could thread the strut onto through the existing hole, and the other end lines up at the precise distance under the drill press bit so drill the next hole in the exact place I need to make the centerpoints accurate.
After finishing the C struts, I repeated the measuring procedure to the B's and A's, drilling new holes in the 1x4 template at progressively closer spots for the alignment bolt placement (according to the centerpoint measurements for each strut type), and drilled away quite happily. It was actually easier and faster than drilling the holes on the first side, because the strut lined up so precisely and easily just by dropping it onto the bolt. The two screws I had used during the drilling of the other ends kept the struts perfectly straight on the board. It was only a little tough towards the end, when the bit was getting dull.
Here's the one thing that went wrong: If I ever do this again, I need to make careful note of exactly where I drill the first hole, and check where that hole will force the second hole to be. As you may recall from above, I drilled the first hole roughly 1/4" from the end, figuring that was the minimum distance I wanted it from the end of the strut (for strength reasons). I'd rather have it be a little close to this side than the other, since I can't add length to the pole if I was to drill too far in on a slightly short pole and it puts the other hole too close to the far edge. Sounds reasonable, right? If one strut was 1/8" too short, I could theoretically end up with a second hole needing to be placed 1/8" from the far end, which really isn't enough to give enough material to properly hold a bolt. This worked great on the A's and C's. So... reasonable, yes... except when you consider the limited amount of squished surface on the other side. On the B's, I ended up needing to place holes (on some, at least) that were half on the flat part, and half onto the round part of the strut -- clearly, an unworkable situation. And others had the hole placed all on the flat, but far too close to the part where the pole starts going back to round... we need room for the washers, after all! To make a long story short, I ended up needing re-squish all 57 of the B struts, adding another 1/2" of flattened pole to each. This gave me all the clearance I needed, and frankly, didn't take all that long. So all's well that ends well. But it wasn't as pretty of a result as it could have been, and it made me do more work than I should have had to. Lesson learned: Measure for *both* holes on sides of the pole before drilling, and make sure you have clearance for the nut on both ends, and aren't too close to the non-flattened area. I should have drilled right down the center of the squished area, and I would have been fine... about 1/8" farther from the end than I was.
HANDS-ON TIME SPENT: 4.0 Hours
EXPERIMENTATION, ERRANDS, ORGANIZATION TIME SPENT: 1.5 Hours
RUNNING TOTAL: 15.0 Hours hands on, 12.0 Hours other
Saturday & Sunday: 7/13-14/02
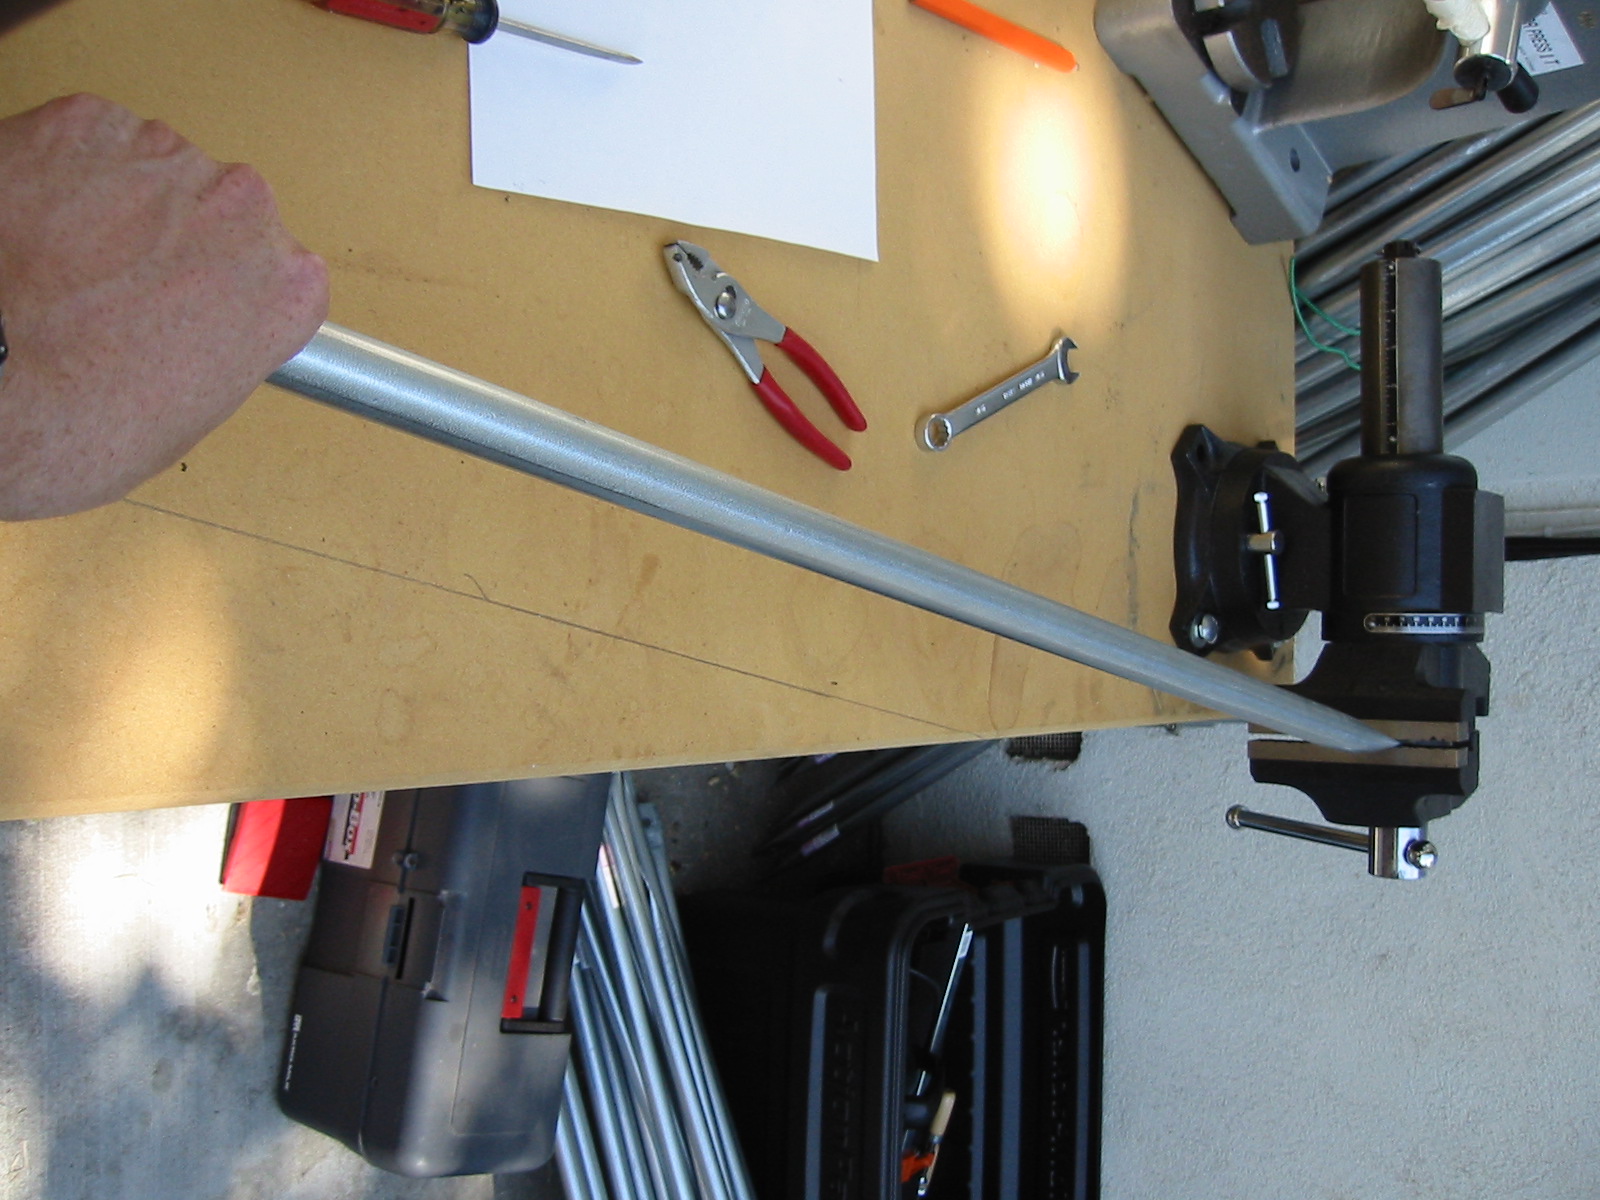
The last step! I re-checked all my calculations just to make sure, and re-checked the DesertDomes site for the angles I needed to bend the tips. Turns out the A struts need a 10 degree bend, and the B's and C's both need 12 degrees. I kicked around various ideas for measuring and keeping the correct angle, and ultimately figured it was easiest to use my bench vise. I set up my vice on the cover of the table, and rotated the jaws 90 degrees so they faced the side.This way, when I inserted the squished and drilled end into the jaws, the strut was suspended a few inches above the surface of my worktable. I then simply took a protractor (actually, I couldn't fine mine from high school geometry, so I found one online and printed it nice and big!) and measured a 12 degree line from the edge of the table, and drew it (in pencil) right onto the surface of the workbench. From there, I simply went to work: (1) insert strut, tighten, (2) push strut until parallel to the 12 degree line below it (see photos), (3) flip strut around to insert other end, (4) bend as before. Repeat until all struts bent. The only difference is on the A's, I bent them a wee bit less. 10 degrees isn't all that far off from 12 degrees, after all, and the metal is quite springy... it'll all line up just fine. This bending process went extremely quickly... perhaps 2 hours for both sides of all the struts. This was the easiest step of all, I'd have to say, even easier than the squishing (which took more oomph).
Since I'm now done working the pieces into shape, I decided if I was going to start working with and possibly mixing up the sections, I should label them in some way, just to make it all easier while they're jumbled on the ground. I simply took some electrical tape and put a colored band around each of the A's (yellow) and each of the B's (red). I'll label the C's before I go, in case I lose any of the other labels in the dust, but this will suffice for now. It only took a half hour to mark each of the two types with a little band of tape. I was careful not to put the bands all in the same place, otherwise they'd all come together when bundled up for transport and would prevent them from lying alongside each other nicely. Overkill? Perhaps. Easy? Definitely. I'm taking no chances with the playa...
Now began my bolt dilemmas. Here's the issue: Home Depot has apparently changed the type of bolts it carries. This project uses standard coarse threaded 2.5" long 3/8" Hex bolts, the kinds with a hex "nut" on the end, as opposed to smooth-topped carriage bolts, which have no good way to tighten down from the bolt end (not the end the nut goes on). The new hex bolts Home Depot carries, however, are only threaded up to about 1" from the top of the bolt... in other words, the ends are threaded, but not the entire shaft of the bolt. They didn't used to be like this, but now, the only bolts of this size and shape they carry that are threaded the entire shaft are galvanized vs. zinc-coated. Problem is, the regular zinc-coated ones are $0.22 each, vs. $0.67 each for the galvanzed ones. I need a box of 100, and don't want to spend $60 on bolts when it should be about $20!
I picked up a few of each type just to see how they work, however, and it looks to me as if the smooth shaft ones will work -- barely, but they'll work. There are enough metal ends sandwiched in there that once you add in the washers (2 of them), you clear the smooth part and get into the threaded section. The bottom of the dome has fewer poles at each intersection, but I think if we double up the washers it will still be ok. After work I'll try to find a Home Depot that has the damn things in stock (computer inventory vs. shelf reality is not an exact match there, apparently), I'll pick up a box and then I'll be ready for the full assembly! Yeah, baby! I used the bolts I had lying around to throw together a couple of the sections just for fun, photos are below.
This concludes the raw material preparation of the dome, clicking in at 30 hours (total) on the nose. I'll bet I could do one in less than half of that time if I had all the tools and materials assembled in one place and at one time, and had someone helping me by doing simple things like passing me struts, etc. The next entry you'll see should be the full-blown assembly procedure. Woohoo!!!
HANDS-ON TIME SPENT: 2.5 Hours
EXPERIMENTATION, ERRANDS, ORGANIZATION TIME SPENT: 1.0 Hours
RUNNING TOTAL: 17.0 Hours hands on, 13.0 Hours other
Tuesday, 7/16/02
If you build it, they will come...
This certainly proved true of my parents' neighbors. Everyone wanted to know what on earth I was building in the front lawn on a quiet Tuesday evening in suburbia. Shaking heads abounded.
BUT I DID IT!
I built it. With my own two hands (well, my buddy Bill helped wtih the actual assembly, but I did everything else alone). It was quite the satisfactory conclusion to what has been a long effort. Here's how it went:
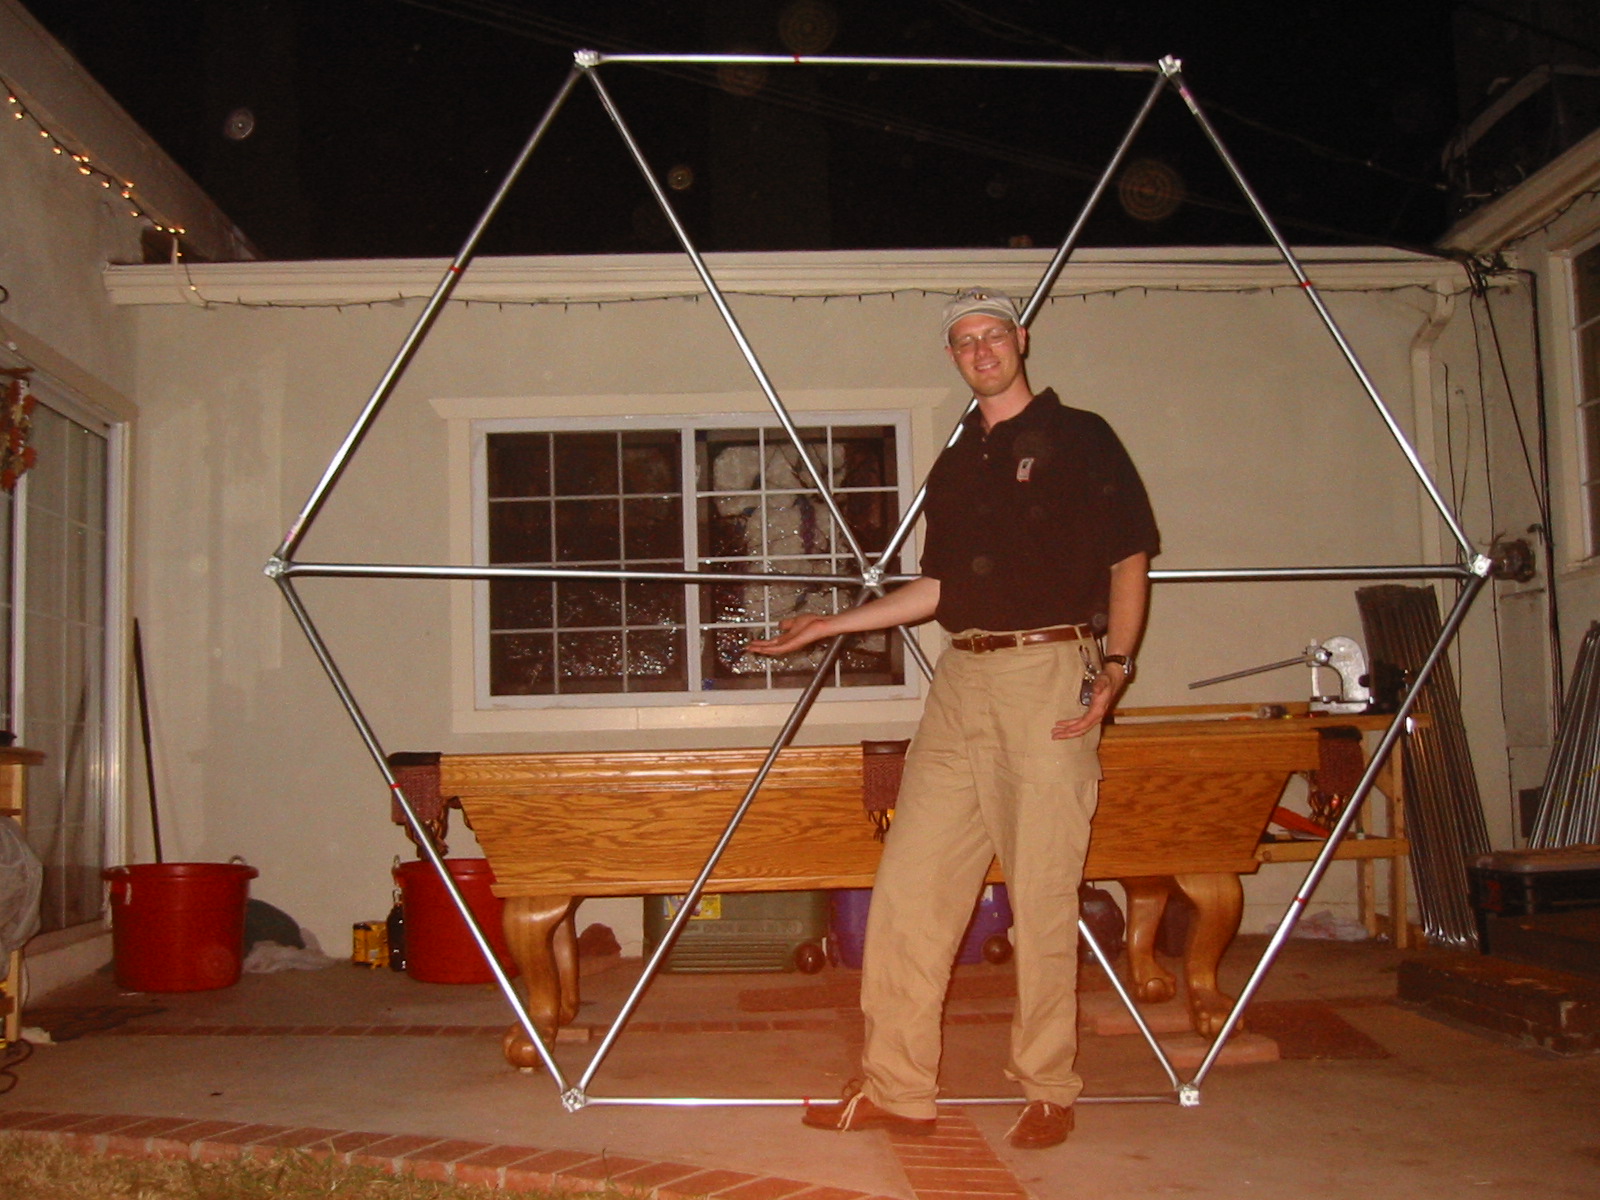
9:00: My buddy Bill and I arrive, unload the car and get psyched up. I layed out the pipe in a circle on the ground at the approximate size I knew I'd need. Next time I'll use some string as a compass to create a more precise circle for that first layer, but this got the job done. Be careful, though! It's really easy to get confused and put a B where a C should be and such, and it sucks to have to go back and fix things later. Studying my construction diagram (see the center picture at the top of this page, obtained from Tara's DesertDomes site), I completed laying out the first level of pieces. Note to self (and others): the initial (ground-level) ring has 15 sections. This is not clear from the graphic, and if you forget it can take quite a while to figure out just where and how to begin. The second rung also has 15 poles.
9:35: Construction begins, with frequent breaks for Chinese food. :-)
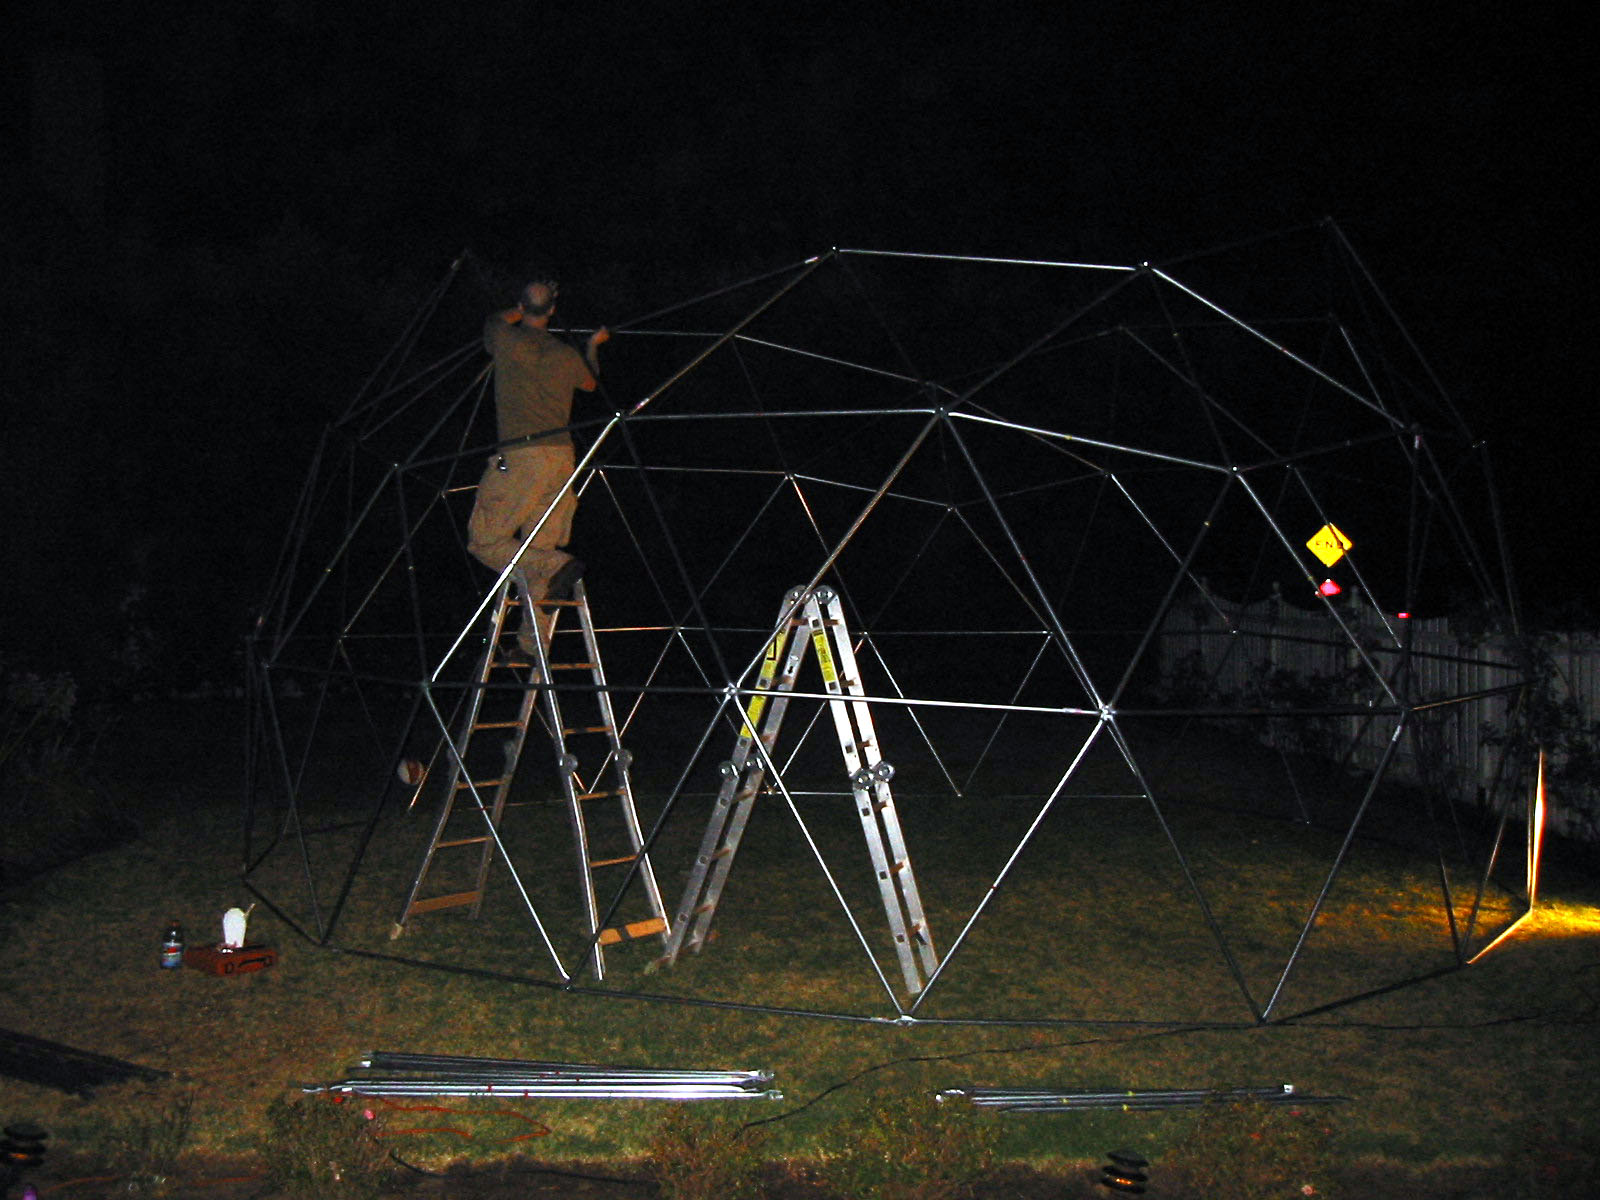
10:30: Level one is finished, and we begin the second level. Ladders are already becoming essential. I'm guessing about 45 minutes to an hour per level is the norm?
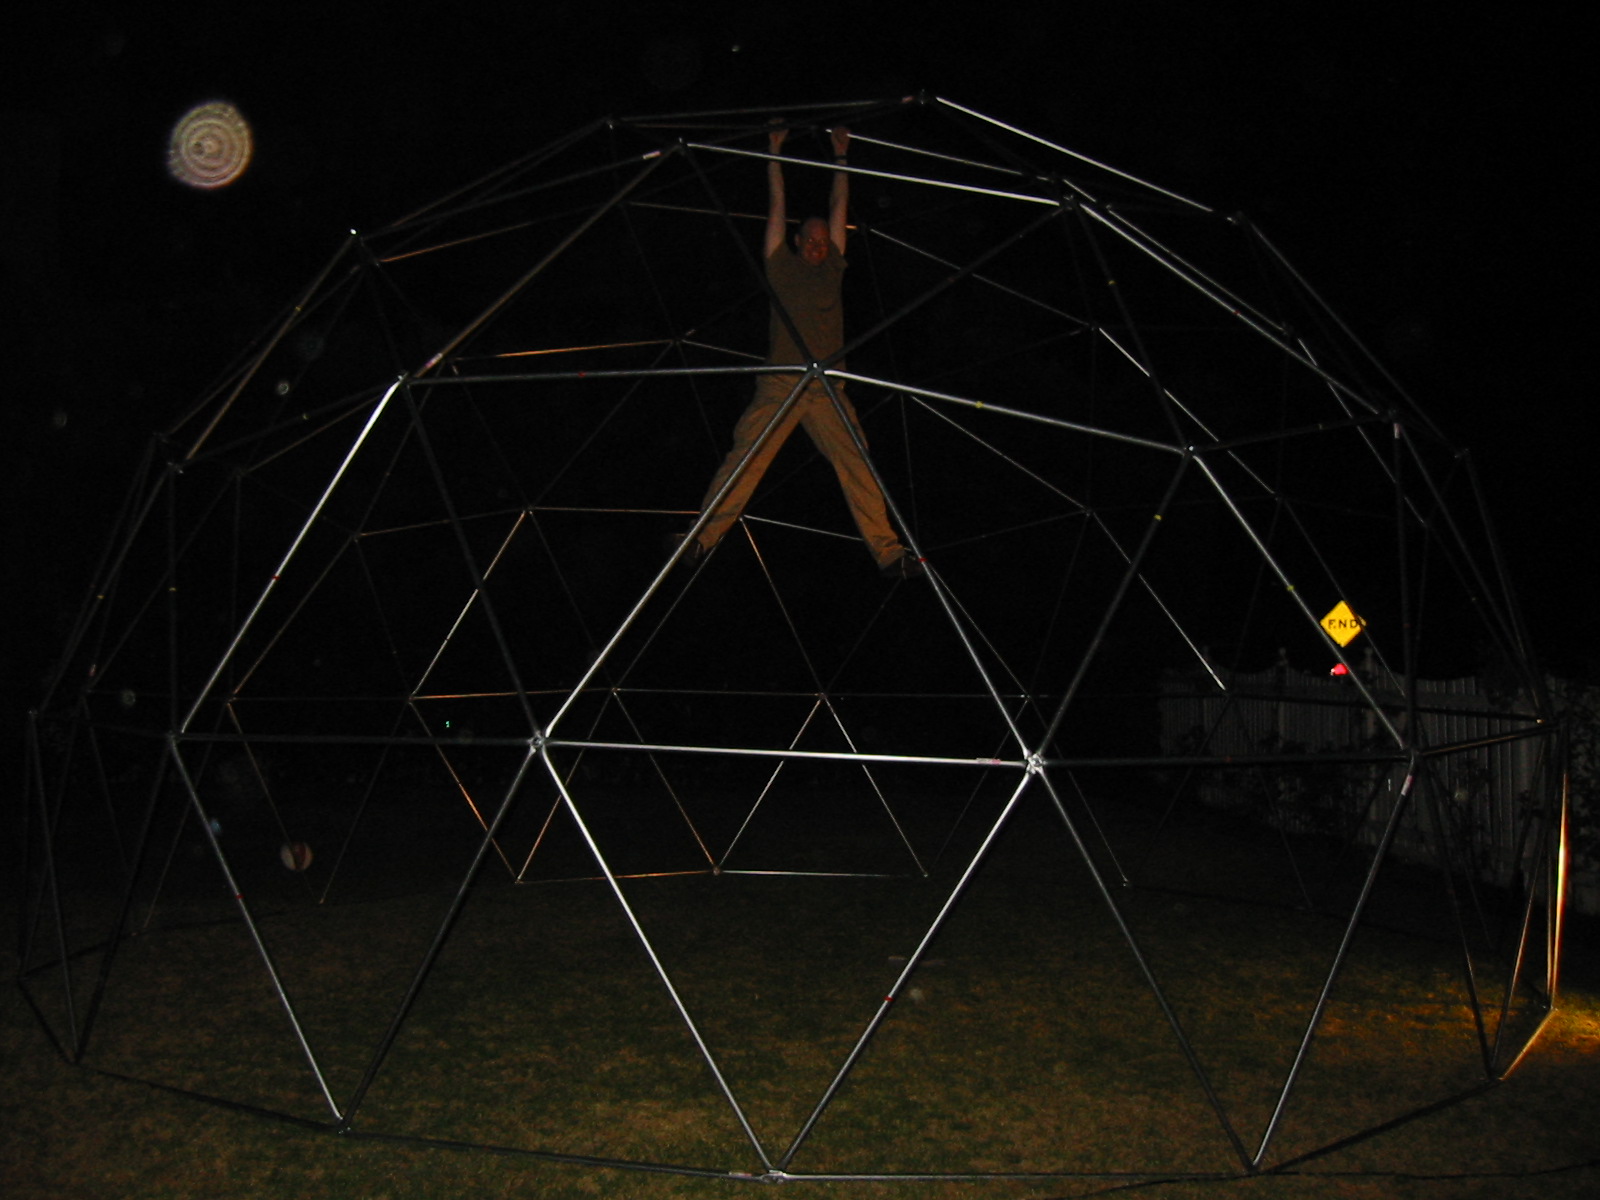
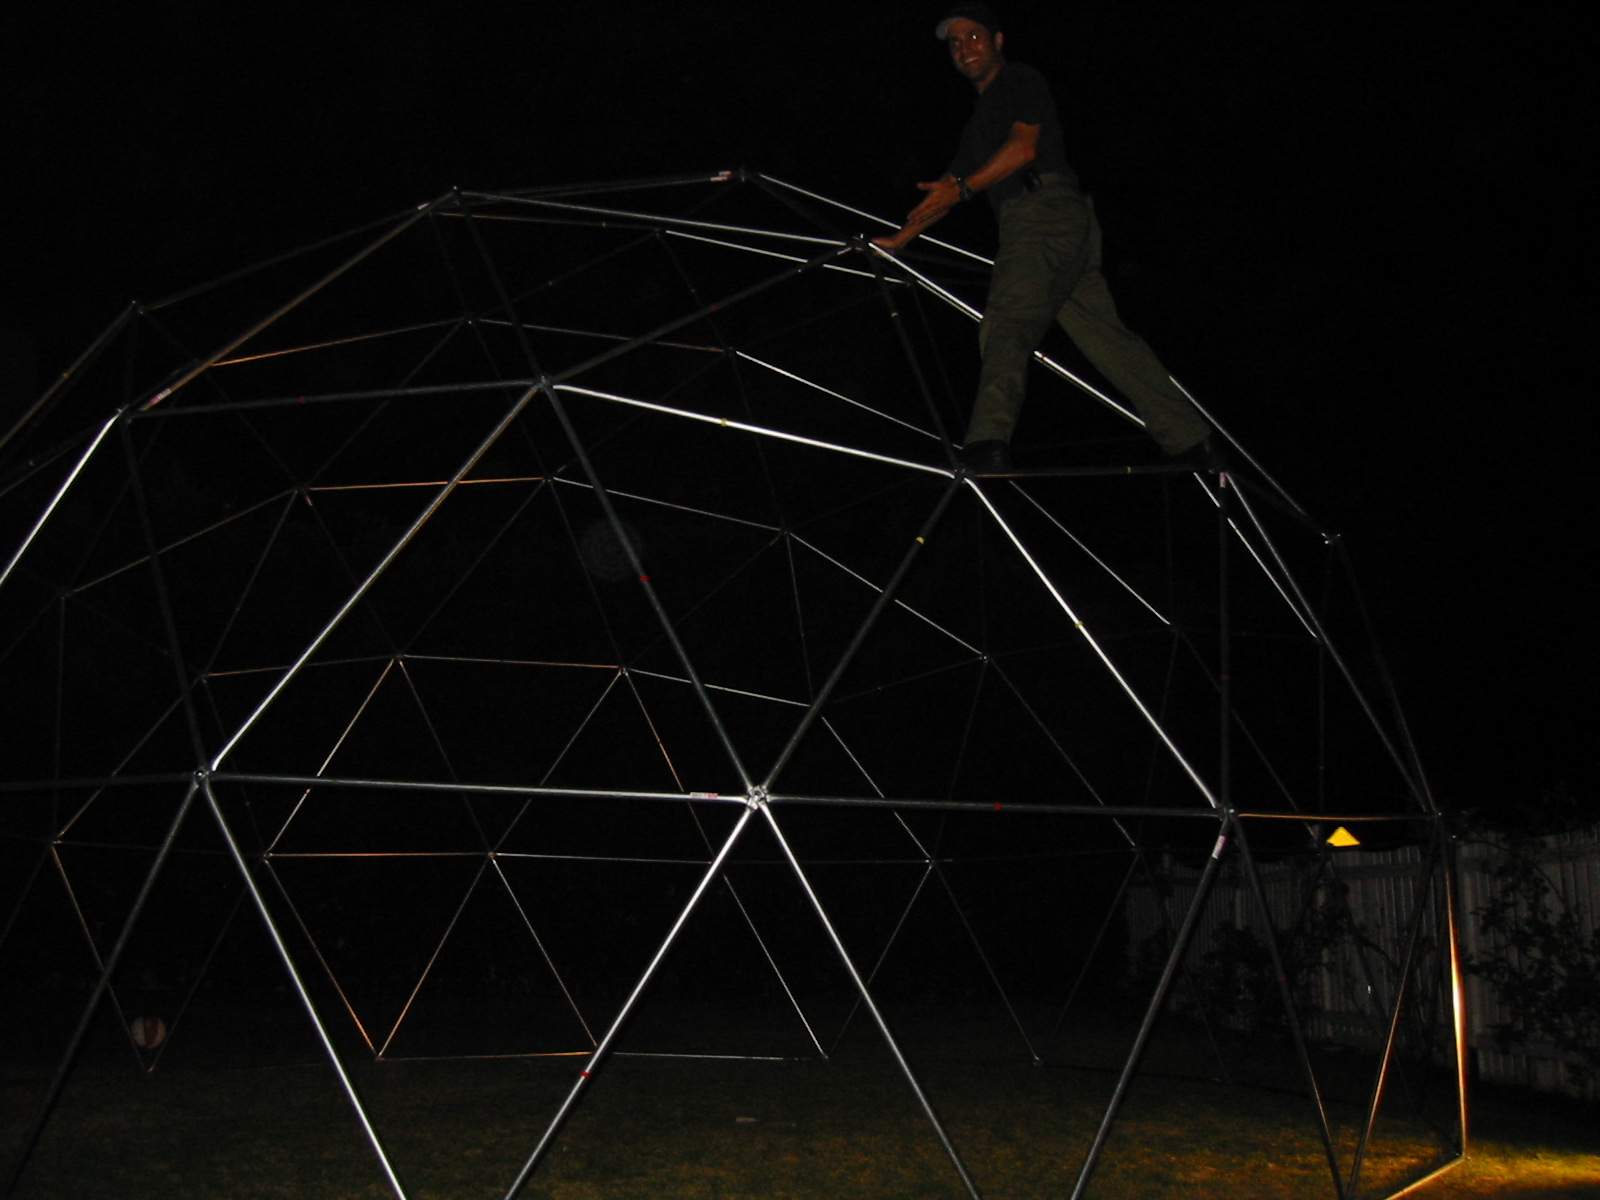
1:30am: We did it! Four hours, start to finish, with two people and two ladders. Not too shabby, if you ask me. We put the last poles that form the apex, consisting of five A struts in a star, together on the ground and brought them up as one big piece, attaching the ends to the structure.
I think that more hands would be of limited value. Perhaps one mer person on the ground as a runner, handing the two people on the ladder poles, nuts and bolts as needed would be helpful. And if you had two more ladders and two more people, you could probably have two crews working on things at once on opposite sides of the dome. But once you get towards the middle, space would get tight. That being said, I think I'm going to need more people (on ladders!) when I put this thing together with the turbine vents. I suspect I'll do something similar to Jeff, and construct the entire section on the ground with the turbine in place and lift it up as one big section. That's going to be heavy enough that I'll need more than two sets of hands, however.
Also, note that I put this thing together with two 14' accordian style ladders (mine, and my dad's). Jeff, who built this same size and type of dome before me, needed a 17' accordian ladder to get it built. That's because I'm 6'3" tall. Most people aren't. (Note that 14' and 17' refers to the length of the ladder used straight out... in the "A" configuration we had to use so they were freestanding, they are less then half of their extended height, naturally.) I *BARELY* was able to reach the highest bits standing on my tip-toes on the very top level of the ladder. I also have excellent balance, so don't sue me if your dumb ass tries it and falls off! I strongly recommend against the 14' ladder option to anyone who isn't at least 6'3". I myself would have had a much easier time with the slightly taller ladder. The extra 1.5' ("A" configuration for the ladder, remember?) would have made a big difference at the highest levels and the peak.
That's it for now. Now I have to go buy some tarps for the final product. I'll take plenty of pictures, I promise!
HANDS-ON TIME SPENT: 4.0 Hours
EXPERIMENTATION, ERRANDS, ORGANIZATION TIME SPENT: .5 Hours
RUNNING TOTAL: 21.0 Hours hands on, 13.5 Hours other